How to record mass-locking and unlocking operations
If you suspect problems with mass operations - unlocking, centring and locking - of Güralp 3-series instruments, Güralp support may request that you send GCF recordings illustrating the problem. This page describes the sequence of actions required in order to make an effective, complete recording of these operations.
Scope
![]()
![]()
![]()
![]()


![]()
This page specifies the procedure if:
- you are testing a digital instrument containing a CD24 or DM24 digitiser, such as a 3TD, 3TDE, 3ESPCD or 3ESPCDE; or
- you are using a CD24 digitiser, a DM24 digitiser (including DM24SxEAMs) or an Affinity acquisition system as the recording device for your suspect instrument.
If, instead, you are using a Minimus digitiser, click here to access appropriate instructions.
The procedure
-
Connect the digitiser to a PC running Scream.
-
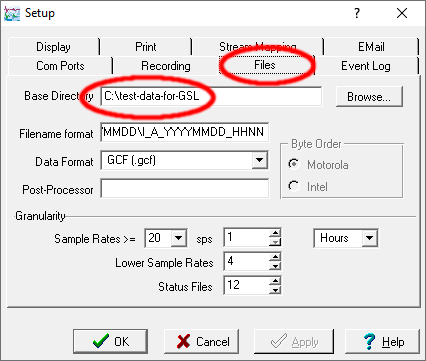
Set Scream to record streams into an empty directory, by choosing and entering an appropriate path in the field:
-
While still on the tab, ensure that the is set to GCF:

-
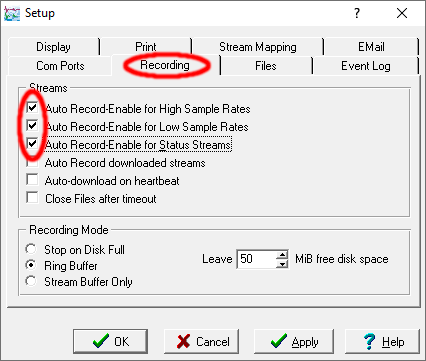
Change to the tab and set Scream to automatically record all streams by ticking the first three check-boxes as shown:
-
Power up (or power-cycle) the digitiser. (This generates a lot of useful configuration and diagnostic information in the status stream.)
-
Wait until the digitiser icon (
 )
appears in Scream’s main window, if it is not there already.
)
appears in Scream’s main window, if it is not there already. -
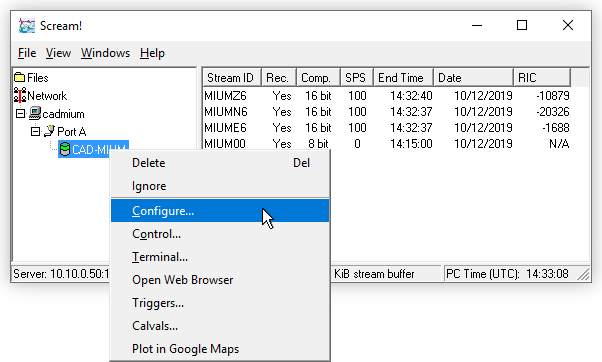
Right-click on the digitiser icon and select :
-
Go to the tab and ensure that the check-boxes for M8, M9 and MA are ticked in the section.
- If they are already ticked, click

- If they are clear (i.e. if they are not ticked): tick them, click
 and wait for the digitiser to reboot.
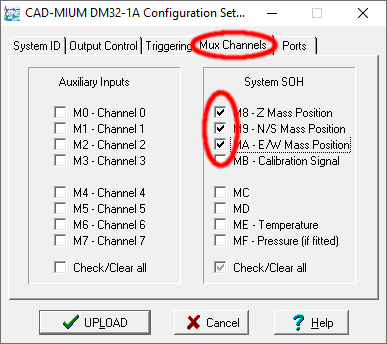
- If they are already ticked, click
-
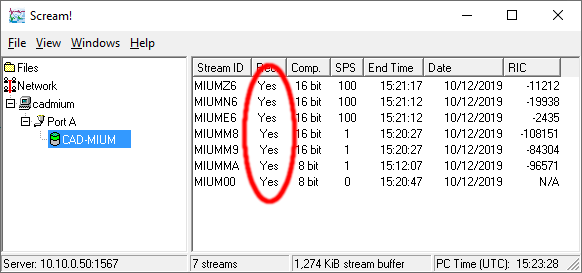
In the main window, check that streams have appeared for all three velocity components (those ending in Zn, Nn and En), all three mass-position streams (those ending in M8, M9 and MA) and the status stream (which ends in 00). If they are not all present, wait until they are - this might take a few minutes for the low sample-rate mass-position streams. Once they have all appeared, ensure that the word Yes appears in the column for all of these and, if not, right-click the stream and select "Start recording".
-
Right-click on the digitiser icon (
)
and select :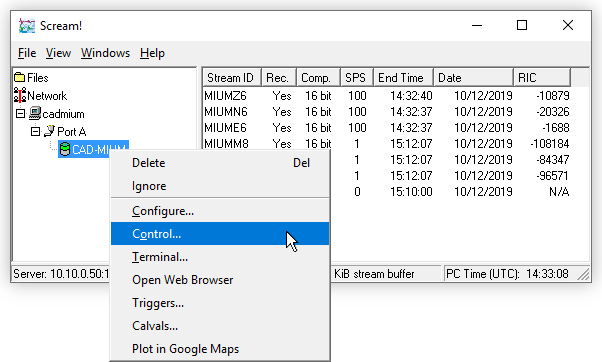
-
Go to the tab.
When using a DM24, an additional check-box is displayed, labelled Monitor Progress. Ensure that this check-box is cleared before proceeding.Click

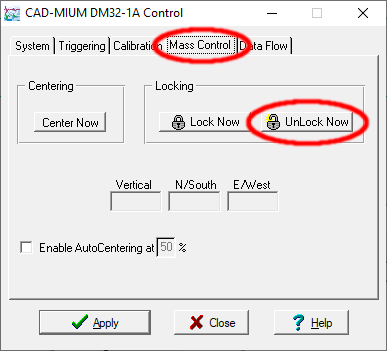
Wait ten minutes for the operation to complete and the outputs to settle.
-
If you are recording these data because you are having problems with mass centring, click
 and note the time:
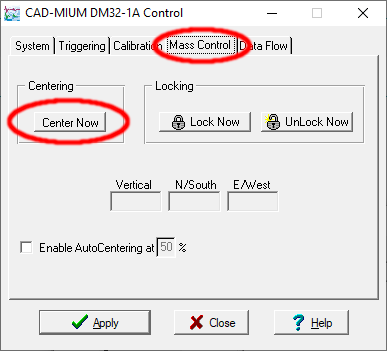
Wait ten minutes for the operation to complete and the outputs to settle. Repeat this step several times at ten minute intervals, noting the time at each step.
-
Click

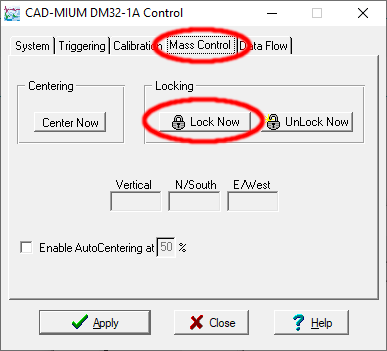
Close the dialogue and wait ten minutes for the operation to complete and the outputs to settle.
-
Gently tap the side of the instrument with your finger-tip.
-
Wait twenty minutes: this is necessary because mass position channels (typically being output at at one sample per second) can take over sixteen minutes to assemble enough samples to fill a packet.
-
Right-click on the digitiser icon (
)
and select :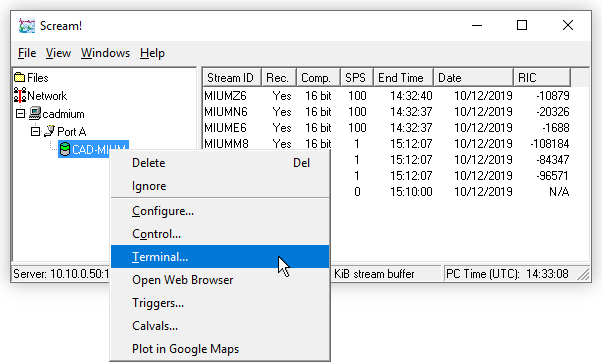
A terminal window should open.
-
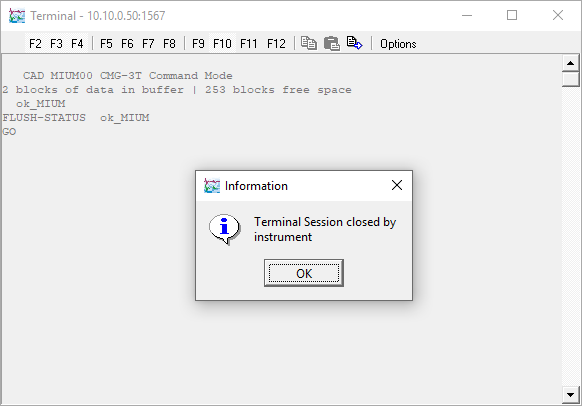
Key enter a few times to get the digitiser’s attention, then enter the command FLUSH-STATUS
-
Enter the command GO – the terminal window should close:
-
In Scream’s main window, click the word in the column header for stream recording.
-
Scream will prompt you Stop recording on ALL streams?:
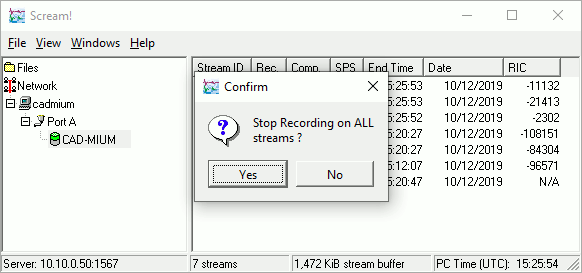
Click
 :
this flushes all outstanding recording buffers to disk. (You can
re-enable them immediately if you wish to continue recording for any
reason.)
:
this flushes all outstanding recording buffers to disk. (You can
re-enable them immediately if you wish to continue recording for any
reason.) -
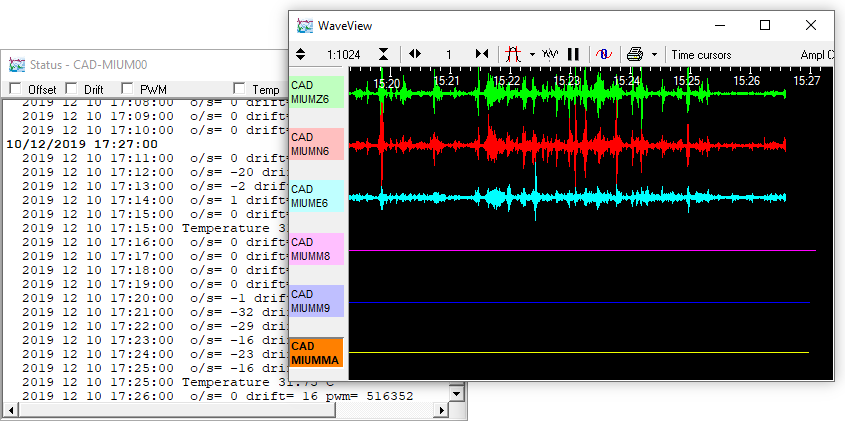
View the files in the recording directory to check that they are all present (the three velocity channels, the three mass-position channels and the status stream). In Windows, you can do this by selecting all the stream files, right-clicking and choosing :
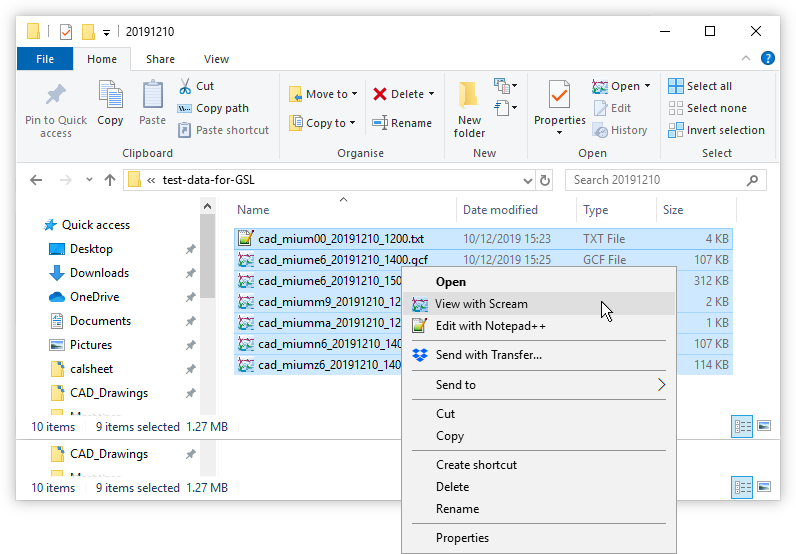
This should open a WaveView window with at least six traces and a status-viewing window:
-
If you have recorded all three velocity streams, all three mass position streams and the status stream, and you have verified that the recordings cover the entire experiment, attach all the files from your recording directory to an email and send it to , where it can be used for diagnosis.