Firmware Upgrade Procedure for Minimus₂ / Minimus Lite
Overview
Minimus₂ / Minimus Lite digitisers are not yet supported by Discovery's system. Firmware updates are currently only possible using the facility. To perform the upgrade, follow the instructions below.
The Procedure
-
Download the latest firmware build from here and save the file.
-
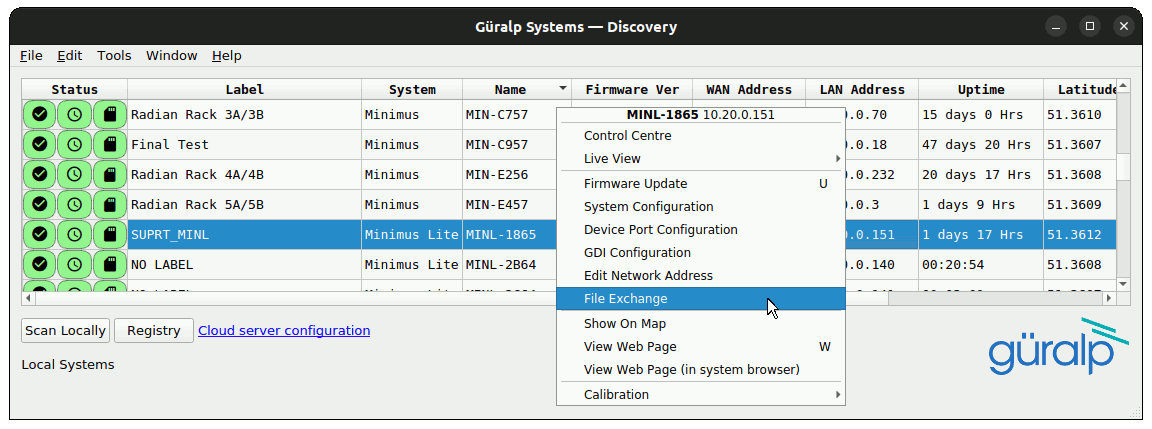
Open the Discovery software and locate the digitiser to be upgraded.
-
Right-click on the digitiser to upgraded:
- Right-click in the LAN Address column if you can access the digitiser over your local area network; otherwise
- right-click in the WAN Address column.
-
Select from the context menu:
-
The File Exchange dialog opens. Either:
- type the path of the firmware image (the file that you saved in step one) into the box; or
- click
 and navigate to the firmware image.
-
Type /ram/minimus2_project.bin into the box.
Double-check your typing. This must be exactly as shown or you risk damage to your digitiser.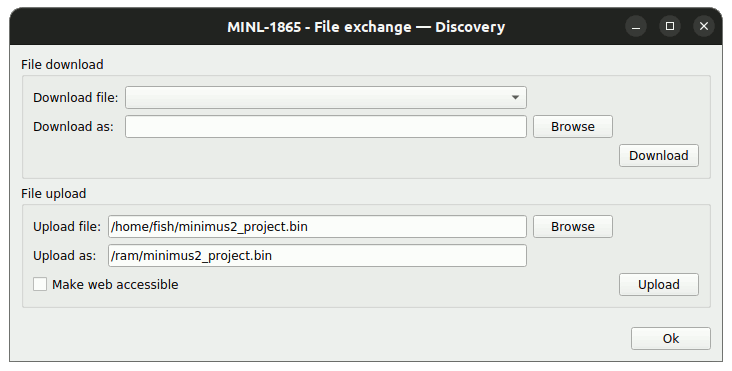
-
Click
 to begin the firmware upload.Do not click
 at this stage.
 -
The File Exchange dialog will be greyed out and the following notice will appear:
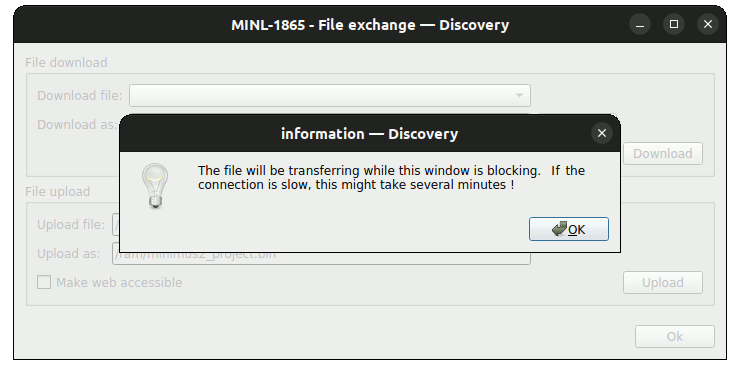 Do not remove power from the digitiser while the upload is in progress.
The LED in the digitiser will glow a steady blue during the upload, which can take up to several minutes. When the upload is complete, the digitiser will reboot automatically and the LED will start flashing as normal.
-
Use the web interface to check the the digitiser has restarted and is running the new firmware image. Once satisfied, return to the File Exchange dialog and click
.
This completes the procedure. In case of difficulty, please contact .