Making an indirect connection to Remote Assistance
It is sometimes awkward to connect a Platinum systemA "Platinum system" is any system running the Platinum operating system. This includes stand-alone acquisition systems such as EAMs and NAMs, DAS units such as the Affinity and DM24SxEAM and digital instruments with built-in acquisition systems such as the 3TDE, 40TDE or 5TDE., such as an EAM or 40TDE instrument, to the Internet for remote assistance. For example: in some cases, the only available Internet access is via WiFi so, if the Platinum system does not have a WiFi interface, direct connection becomes impossible. In these cases, a PC or laptop can be used as a gateway, allowing the Platinum system to contact the Güralp remote-assistance server indirectly, via the PC.
For a full overview of the theory behind this technique, please see the Indirect Remote Assistance page. If you are using a Windows PC as a gateway, that page includes a link back here for detailed instructions. If your gateway PC runs Linux, please see the Indirect Remote Assistance - Linux instructions page for detailed instructions.
Configuration for Windows users
To configure an indirect connection:
-
If you do not already have PuTTY installed on your PC, download it from this link and install it, accepting the defaults at each stage of the installation process
If you cannot or do not want to install third-party software on your PC, you can use the Linux command-line instructions in conjunction with the command-line ssh client shipped with Windows 10. (This feature may need to be enabled before use; please see this article for instructions.) -
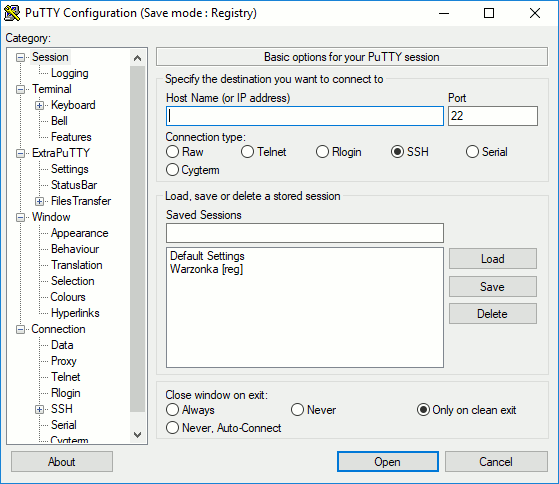
Open PuTTY – the following dialogue is displayed:
-
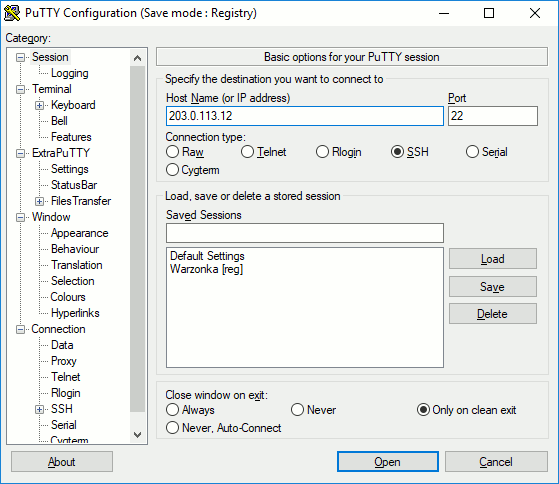
Enter the I.P. address of the Platinum system in the "Host Name (or IP address) field, as shown:
-
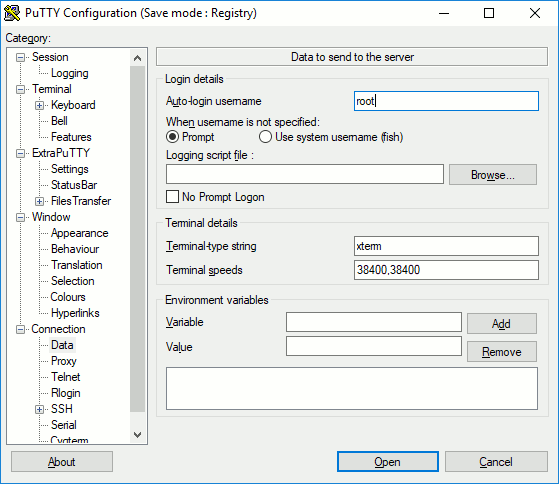
Select from the left-hand menu and enter root as the Auto-login username:
-
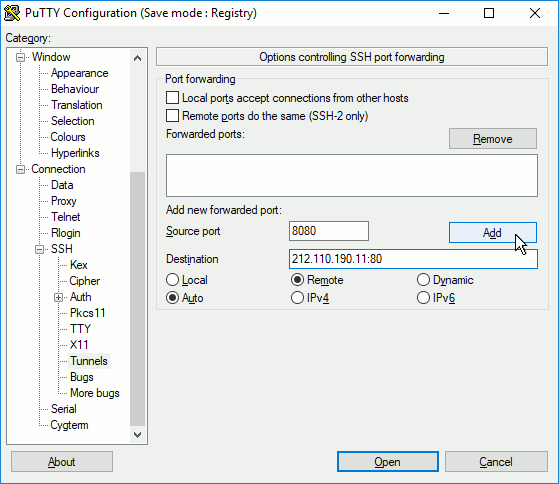
Select from the left-hand menu. In this screen (shown below):
- Enter 8080 in the "Source port" field;
- Enter 212.110.190.11:80 in the "Destination" field; and
- Click the Re_mote radio button.
and then click

 we have used an IP address - 212.110.190.11 - rather than a DNS name here in order to to remove a potential source of problems. If you are confident that your PC has a functioning name-resolution system, you can use remote‑assist.guralp.com:80 in place of 212.110.190.11:80. This provides a degree of future-proofing, guarding against a change in the address of the Güralp remote-assistance server.
 -
Check that a new entry beginning R8080 appears in the central list area exactly as shown:

-
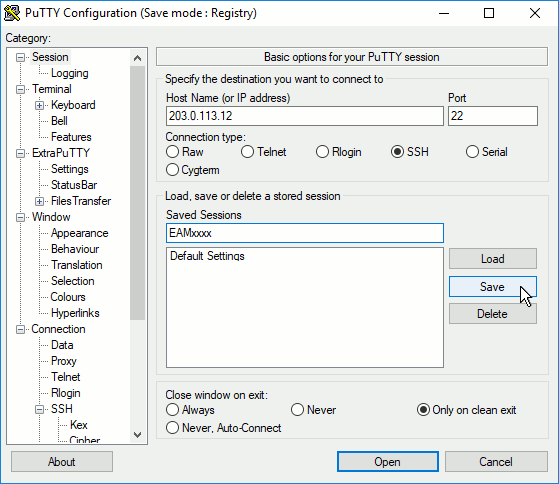
Select Sessions from the top of the left hand menu and enter a name for your Platinum system in the Saved Sessions box above the list of saved sessions. In the example below, we have used the name EAMxxxx but you are free to choose your own.
-
Click
 .
Your new saved session should appear in the list below Default Settings:
.
Your new saved session should appear in the list below Default Settings:
-
Click
 .
The first time you do this, a security dialogue is displayed:
.
The first time you do this, a security dialogue is displayed: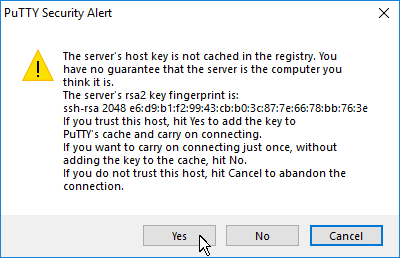
Simply click
 (or, in some versions, "Accept") to clear this.
 -
An emulator window then opens, prompting you for the root password of the Platinum system:
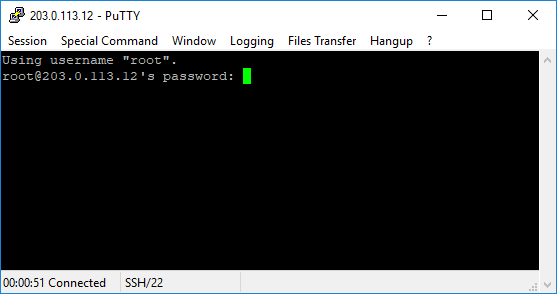
Enter the password and check that you reach the command line.
-
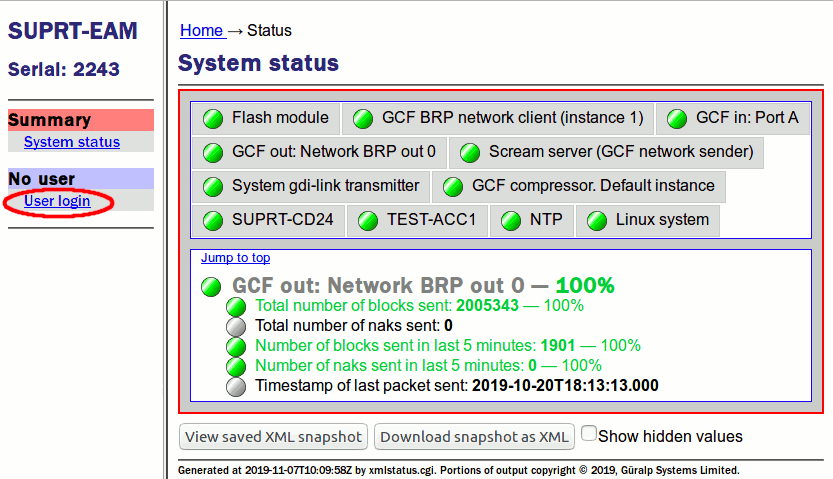
Leaving the emulator window open, switch to your browser and visit the web interface of your Platinum system.
-
Log in as root, using your normal password:
-
Select from the main menu:
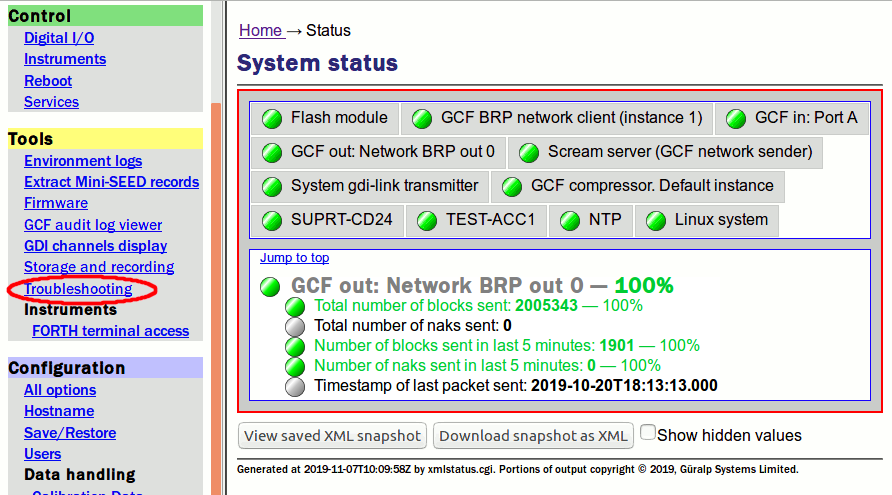
-
Click
 to open the Remote Assistance page:
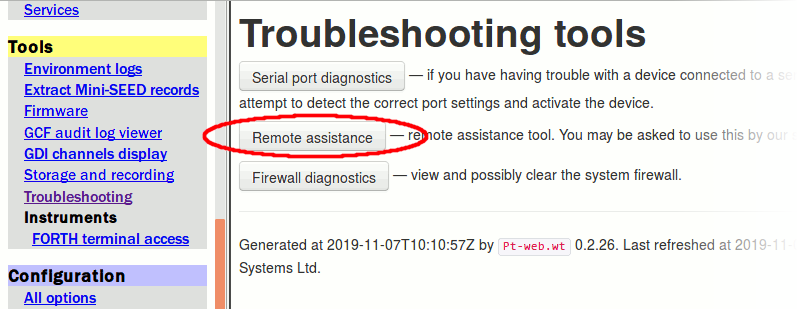
-
Enter your reference number, which will have been given to you by support staff, into the Reference box and click the blue arrow next to Connection log to expand the window and show the log messages:
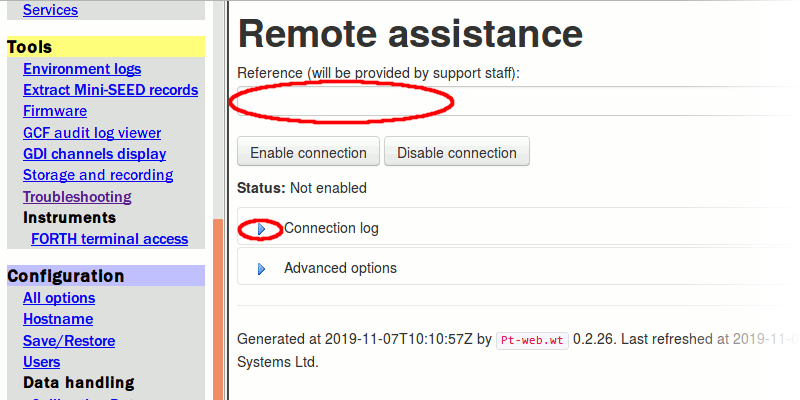
-
Click the blue arrow next to Advanced options to expand the window and show additional configuration options.
In the box, enter 127.0.0.1:8080 and click
 :
:This tells the remote assistance service to connect to the loopback address which is being forwarded via the PC to the real remote-assistance server.
-
Click
 and watch while the progress of the connection is monitored and printed
to the screen.Because we have specified a server, the system will only try to connect via the specified server (rather than in the eight different ways that it normally tries) so, if the first attempt does not succeed, double-check the configuration for errors.
and watch while the progress of the connection is monitored and printed
to the screen.Because we have specified a server, the system will only try to connect via the specified server (rather than in the eight different ways that it normally tries) so, if the first attempt does not succeed, double-check the configuration for errors. -
Once the system is connected, a display like the following is seen:
Once you have verified that the Status: has changed to Connected, please advise Güralp support staff: they can now log in and help you with your problem.
The first time the system connects, a warning is printed in red as shown above. This is normal but it should not appear during the second or any subsequent connection.
The Platinum system should now connect to the remote assistance server using the Windows PC as a port-forwarding gateway.
Troubleshooting
If the system tries to connect repeatedly but you do not see the connected message, check the connection log for any error messages. The most common errors are:
Temporary failure in name resolution
If you see error messages like
the Domain Name Service (DNS) client is misconfigured. If you are running DHCP, this may be a problem with your DHCP server not providing a nameserver (or providing an incorrect one). However, the Remote Assistance system will also try and connect without using DNS, so this error can usualy be ignored.
Network is unreachable
If you see error messages like
the network routing is misconfigured. If you are running DHCP, this may be a problem with your DHCP server not providing a default route (or providing an incorrect one). If you are using static addressing, check and correct the Default route (gateway) field in the configuration page, as described in section 7.1.1 of the EAM manual.
No route to host
If you see error messages like
then either the network routing is misconfigured, as described above, or a firewall is blocking outgoing access on ports 80 and 22. Consult your IT department about opening access for outgoing connections from your system.