Restoring the GCF context menu in Windows versions before Windows 10
Introduction
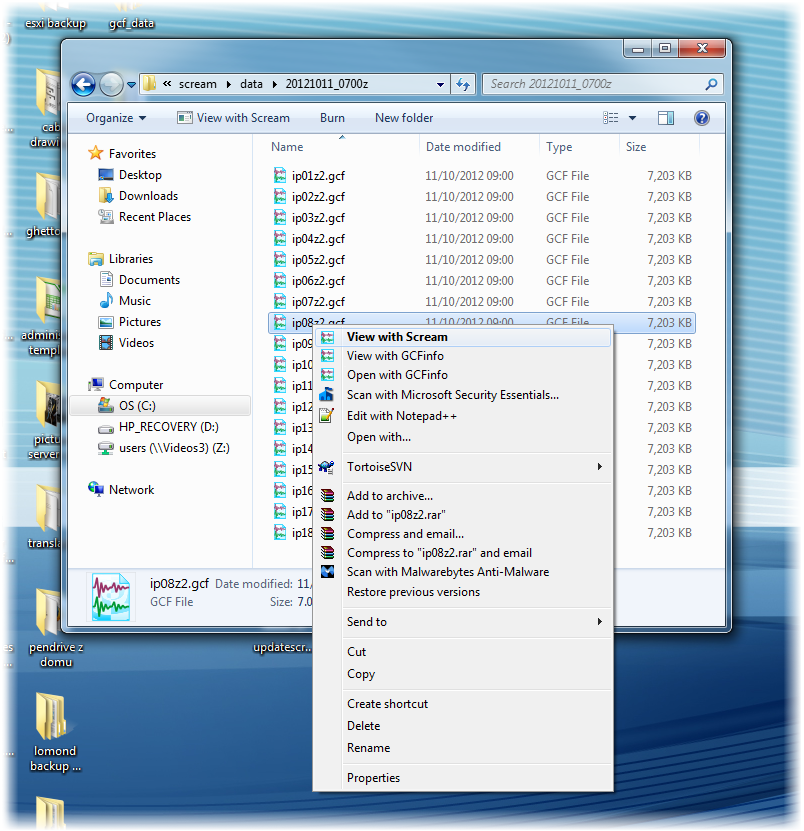
When Scream! is installed, it adds a number of items to the Windows explorer context menu – the menu that appears when you right-click on a GCF file – including the “View with Scream” option.
There have been a few reports of this facility being broken. In these cases, right-clicking on a GCF file will produce a menu with the normal Scream context menu items missing.
This document describes a procedure by which the missing context menu items can be restored. It is written for Windows 7 users but the techniques apply to all modern versions of Windows before Windows 10. See the link above for instructons for Windows 10.
The procedure
The procedure involves clearing any existing file association entries from the Windows registry and then re-registering the library (dll) that implements the menu items.
Cleaning the registry
There are two ways to do this: you can either download and use a third-party software tool or you can use the Windows registry editor. In either case, start by rebooting the PC.
Cleaning the registry using a third-party software tool
Before the library that implements the menu items can be re-registered, it is first necessary to clear any existing file association entries for .gcf files from the Windows registry. The easiest way to do this is with a software tool and there are many such tools available for free download, such as unassoc, from www.winhelponline.com/blog/unassociate-file-types-windows-7-vista/.
If you choose to use unassoc, download and unzip the program (installation is not required). Run the program and either enter .gcf in the field or pick it from the list, as shown below.

Click the
![]() button to remove the file association and then close the application.
Other applications will offer similar facilities.
button to remove the file association and then close the application.
Other applications will offer similar facilities.
Cleaning the registry using the Windows registry editor
If you do not wish to install additional software on the affected PC, the registry can be cleaned manually using the Windows registry editor, regedt32. To do this:
-
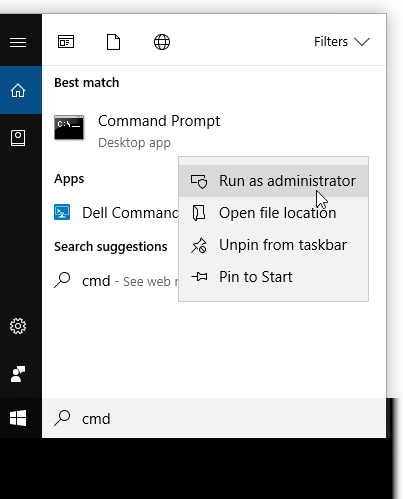
Click the Start button and, in the Search Programs and files field, type regedt32. When the program is found, right-click on it and select “Run as administrator”.

-
Use the left-hand pane of the registry editor to navigate to HKEY_CLASSES_ROOT\.gcf
Right-click on .gcf in the left-hand pane and select Delete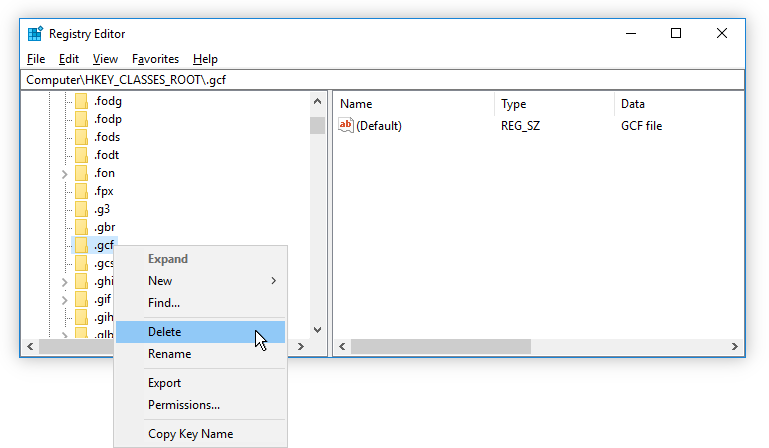
-
You will be asked for confirmation that you wish to delete the key.
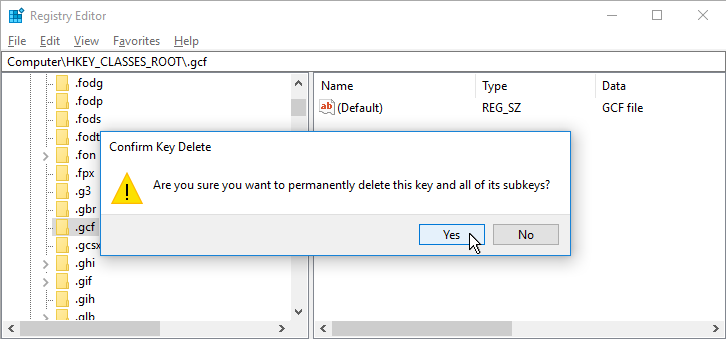
Click
 to continue.
 -
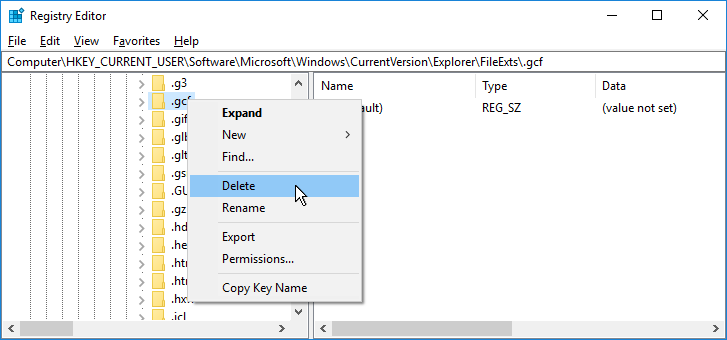
Repeat this process to delete the key HKEY_CURRENT_USER\Software\Microsoft\Windows\CurrentVersion\Explorer\FileExts\.gcf, as shown:
-
Close the registry editor.
Re-registering the library
The context menu is implemented by a library called gcfmenu.dll, which is part of the Scream distribution and should have been installed into the same folder as Scream. To re-register this library, follow the steps below.
-
Click the Start button and, in the Search Programs and files field, type cmd. When the program is found, right-click on it and select Run as administrator.
-
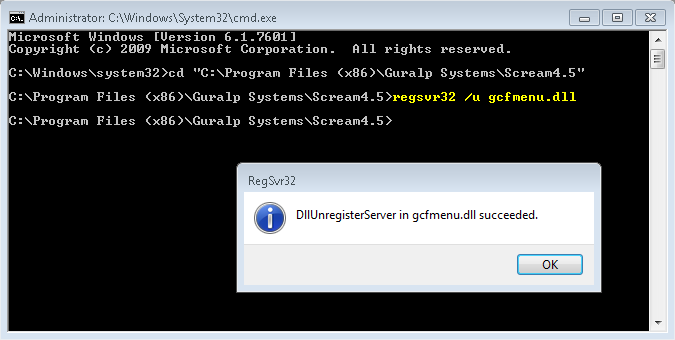
Change directory to the folder where Scream is installed. For example, if Scream is installed under Program Files (x86), enter the command
cd "C:\Program Files (x86)\Guralp Systems\Scream4.6" -
Enter the command regsvr32 /u gcfmenu.dll and click
 in the resulting confirmation window.
-
Enter the command regsvr32 gcfmenu.dll and click
in the confirmation window.

-
Locate a .gcf file and right-click on it. You should see the normal Scream context menu entries, as shown below: