How do I configure my system to transmit mini-SEED data using SEEDlink?
Scope
This document applies to Platinum systemA "platinum system" is any system running the Platinum operating system. This includes stand-alone acquisition systems such as EAMs and NAMs, DAS units such as the Affinity and DM24SxEAM and digital instruments with built-in acquisition systems such as the 3TDE, 40TDE or 5TDE.s. This include
- acquisition systems such as EAMEnhanced Acquisition Module - see the data acquisition page for details. s and NAMNetwork Acquisition Module - see the data acquisition page for details.s;
- digitisers such as
Affinity
systems and DM24SxEAMs;
and - digital instruments with embedded acquisition modules such as 3TDEs, 40TDEs and 5TCDEs.
Terminology
The SEEDlink protocol requires that the data-consumer contacts the data-provider and requests data. This is known as a "pull" connection because the consumer initiates a connection down which it then pulls data. The data-provider does not "push" data to data-consumers unless they request it.
In this document, we will refer to the data-provider as the server, transmitter or sender and to the data-consumer as the client or receiver.
Overview
We first configure the mini-SEED compressor (gdi2miniseed), which packetises the data from the central multiplexer (gdi-base) and we then create a SEEDlink server instance (seedlink-out) with automatic channel naming. Lastly, we filter or map channel names, if required.
Because SEEDlink can be used to talk to many different systems, we're going to use the IRIS slinktool as the test receiver in these examples. This is the reference implementation for the protocol so, if slinktool works but your system doesn't, the fault is probably with your system.
ds.iris.edu/ds/nodes/dmc/software/downloads/slinktool/
Let's get started
Configuring the compressor
In the web interface, visit
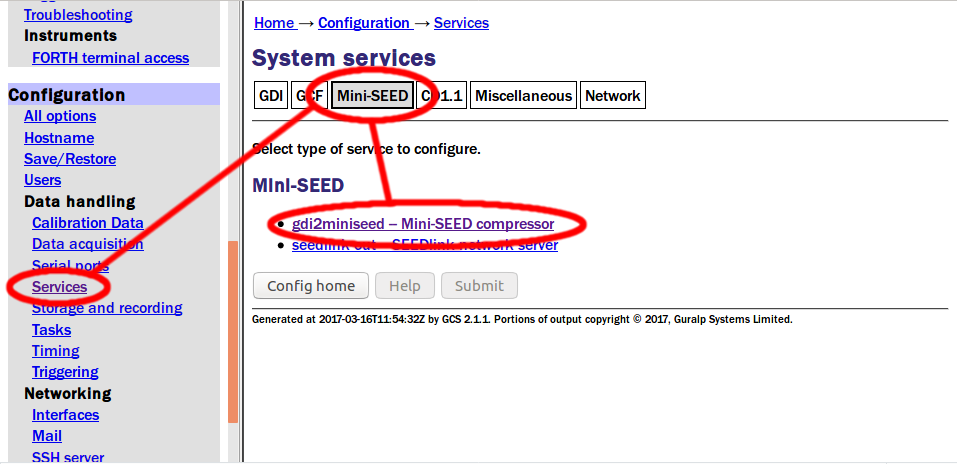
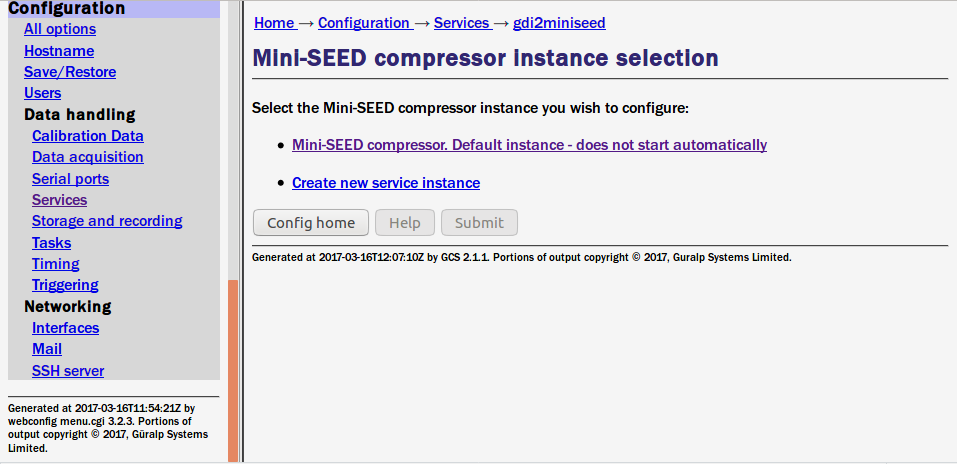
The resulting screen shows a list of all Mini-SEED compressor instances that have been configured:
The SEEDlink protocol requires mini-SEED blocks to be 512 Bytes long. If you need blocks of a different size for any reason, such as local recording, you will need a dedicated compressor; if not, you can use the default compressor. Therefore:
-
If you do not want to record data locally in mini-SEED format, click on .
-
If you do want to record data locally in mini-SEED format and you are happy for your recorded data to have 512-Byte blocks, click on .
-
If you do want to record data locally in mini-SEED format and you want the recorded data to have a block size which is not 512 Bytes, click on
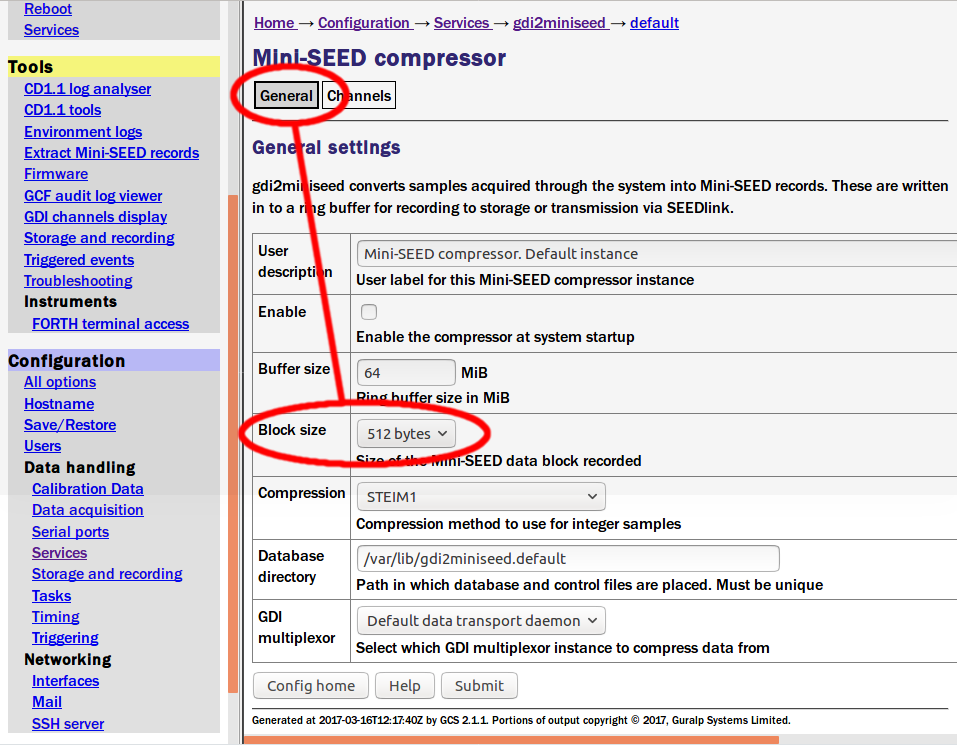
On the General tab, check that the block-size is set to 512 Bytes. This is essential: SEEDlink does not work with other block-sizes.
If you are already recording Mini-SEED data with 512-Byte block-sizes and you have already configured channel name mappings, you can skip the next step. Otherwise, click over to the Channels tab and set Naming mode to Automatic:
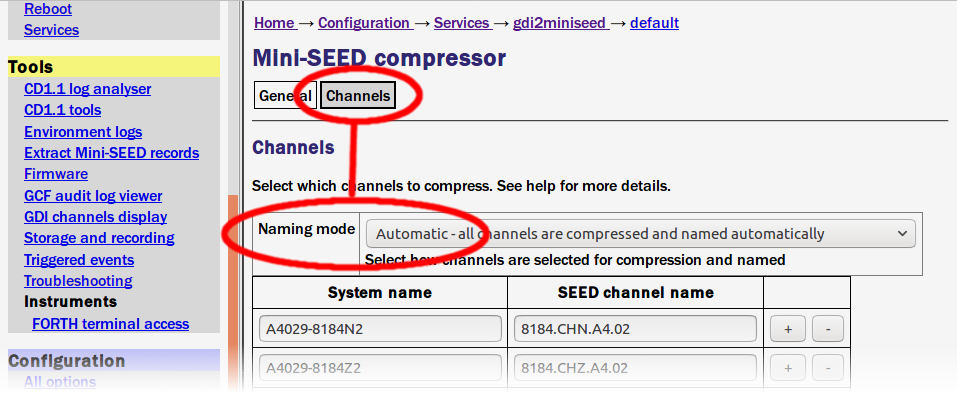
(We can revisit Channel name mapping later, if required.)
Scroll to the bottom of the page and click
 if you have made any changes.
Configuring a SEEDlink server instance
Next, in the web interface, visit
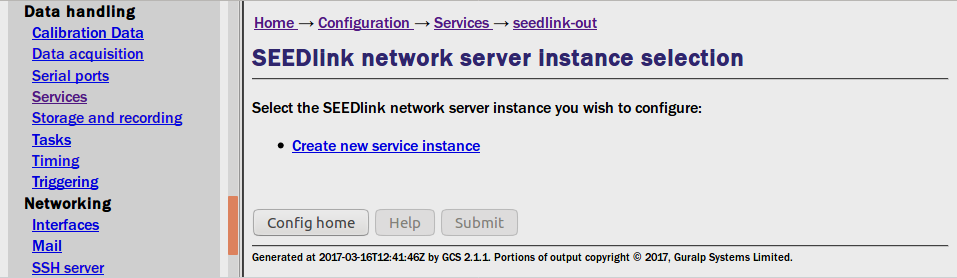
If you have no instances configured, click on ; Otherwise, click on the instance that you have created.
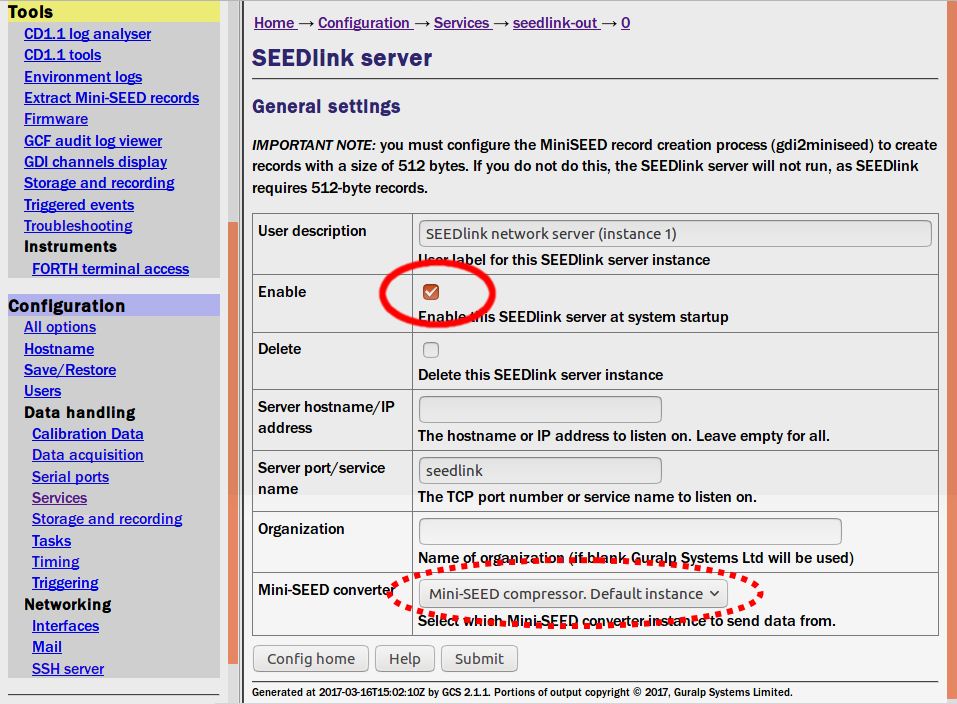
Make sure that the Enable check-box is ticked. The Server hostname/IP address field should be left blank. The Server port/service name should be set to seedlink unless you have a reason to specify a different listener port.
Scroll to the bottom of the page and click
to save your changes.
Next, visit and scroll to the bottom of the page.
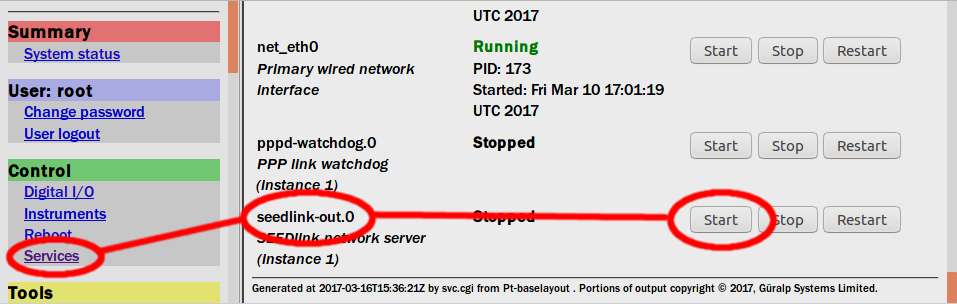
Click
 for the seedlink-out.0 service.
Next, visit status.
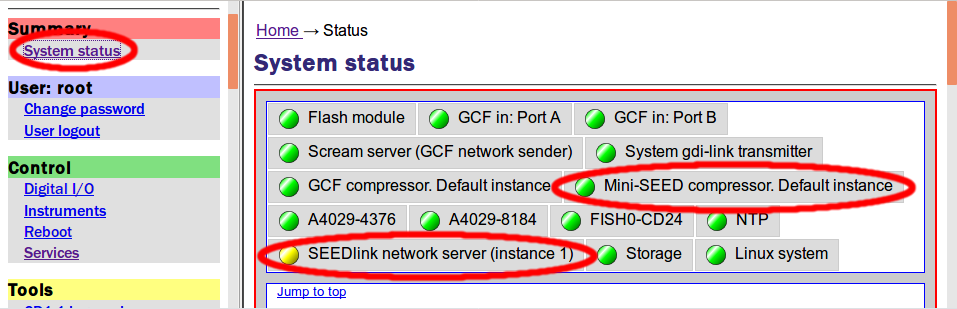
The tab for Mini-SEED Compressor. Default instance
should have a green indicator
( ). It will have started
automatically when you started the SEEDlink server. The tab for
SEEDlink network server (instance 1) should have an amber
indicator (
). It will have started
automatically when you started the SEEDlink server. The tab for
SEEDlink network server (instance 1) should have an amber
indicator ( ) because it
has no clients at the moment.
) because it
has no clients at the moment.
Mapping Channel Names
The system will provide a default mapping between the GCF channel names and the mini-SEED channel names. This is normally adequate but, if you want to use different names for the mini-SEED channels, you can change the mapping. This is easy to do if you run the system in automatic name mapping mode for a few minutes; this allows the system to pre-populate the table with a list of the incoming channels. This is why we have left channel mapping until now.
If you don't want to use the default mapping for channel names or if you don't want to transmit all channels, you should configure this now. To do this, in the web interface, visit
The system will display the list of configured compressors. Select the one that you configured earlier and click over to the Channels tab.
The Naming mode drop-down menu offers three choices:
- Automatic - all channels are compressed and named automatically. This mode offers no filtering and provides system-generated names for each channel.
- Semi-automatic - all channels are compressed, names may be mapped below. In this mode, one or more of the channels may be renamed by editing entries in the mapping table.
- Manual - only channels named below are compressed. This mode offers both channel filtering and name mapping.
 on any row will open a new row. In the same way, rows can be deleted by
clicking the corresponding
on any row will open a new row. In the same way, rows can be deleted by
clicking the corresponding
 button.
If the form is submitted when the table is full, extra blank lines are appended.
When you have finished making changes, scroll to the bottom of the page and click
to save your map.
Testing
The testing described here uses slinktool, which is the reference implementation for a SEEDlink client. We have configured the SEEDlink transmitter to use the default SEEDlink TCP port (18000) so we do not need to specify that during the tests.
Station list
The -L argument to slinktool requests a station list from the server and prints it. You need to specify the IP address or the DNS name of your Platinum system in place of 10.10.0.2 below. Depending on your configuration, you should get one or two lines of output, like this:
If the name(s) of the station(s) is not what you expected, revisit the name
mapping described above and ensure that you clicked
to save any changes.
Packet dump
The -p argument to slinktool prints header details of each packet received. You need to specify the IP address or the DNS name of your Platinum system in place of 10.10.0.2 below.
Type ctrl + C to stop the printing.
If both of these tests are successful, the configuration of your transmitter is complete and you can start to configure your receiver.
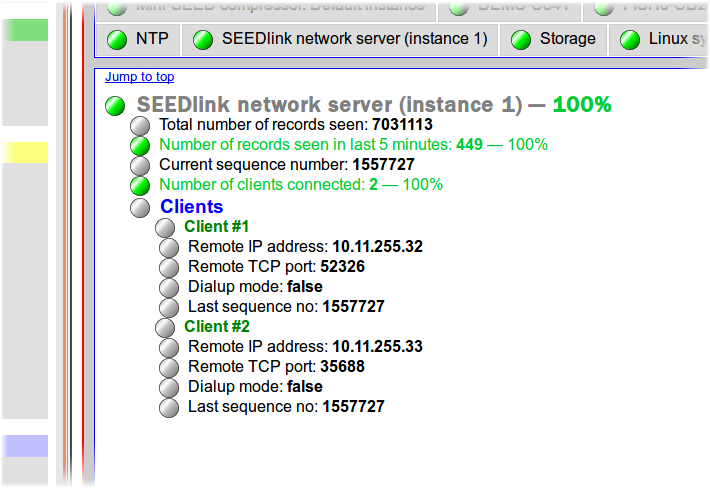
Once your client has connected successfully, its details are displayed in the SEEDlink network server tab of the main status display. If multiple clients connect to your server, they are listed as shown below:
If you have any problems or questions, please contact for help and advice.