GCFXtract 1.4
gcfxtract is a multi-platform tool for reading disks which were written in the DFD format, as used by Güralp digitisers, including 6TD digital instruments.
Download
GCFXtract v1.4.4 for Windows (366 K .zip)
or
GCFXtract v1.4.4 for Linux (410 K .gz)
This linux binary needs access to the Qt runtime library (a 2.4 M .gz), either in your normal library path or in the current directory. If the library cannot be loaded, the following error is displayed:
Runtime error 230 at 080677E9 Segmentation fault (core dumped)This 32-bit linux software runs on 32-bit and 64-bit operating systems. To install it on a 64-bit Linux platform, please follow these instructions to install the relevant libraries.
Usage
The program requires the same libraries as Scream! . If you have problems with dependencies under Windows, moving the program file into the same directory as Scream! or its libraries may resolve them.
As this program requires raw disk device access, it must be run with elevated privileges:
-
On Windows 7 and Windows Vista, it needs to “Run as Administrator”.
-
On Windows XP, you need to be logged in as administrator.
-
Under Windows 10, you can set the program to automatically run with administrative authority by changing the shortcut properties. To do this, left-click on the windows icon
 which is usually at the bottom left of your screen.
In the resulting list of applications, scroll down to :
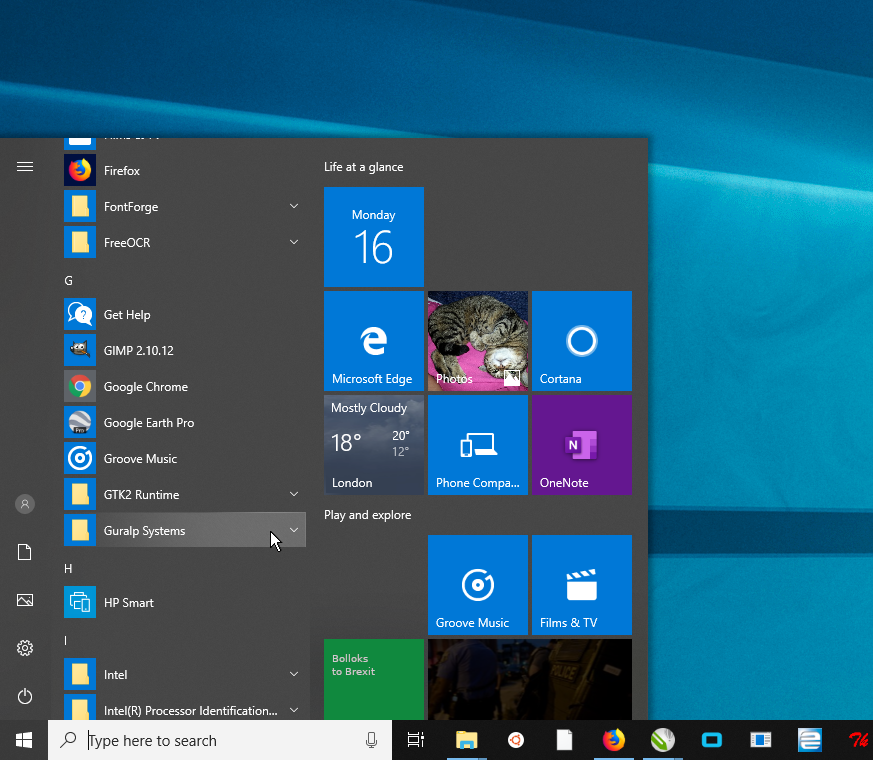
and click the down-arrow to show the contents. Scroll down to :
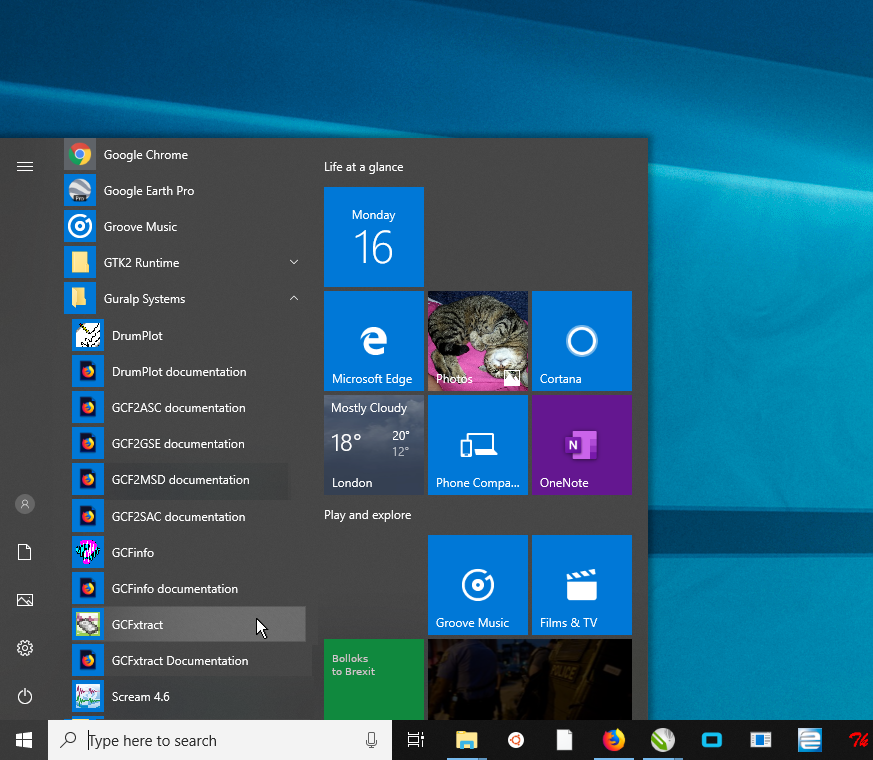
Right-click on and select and then
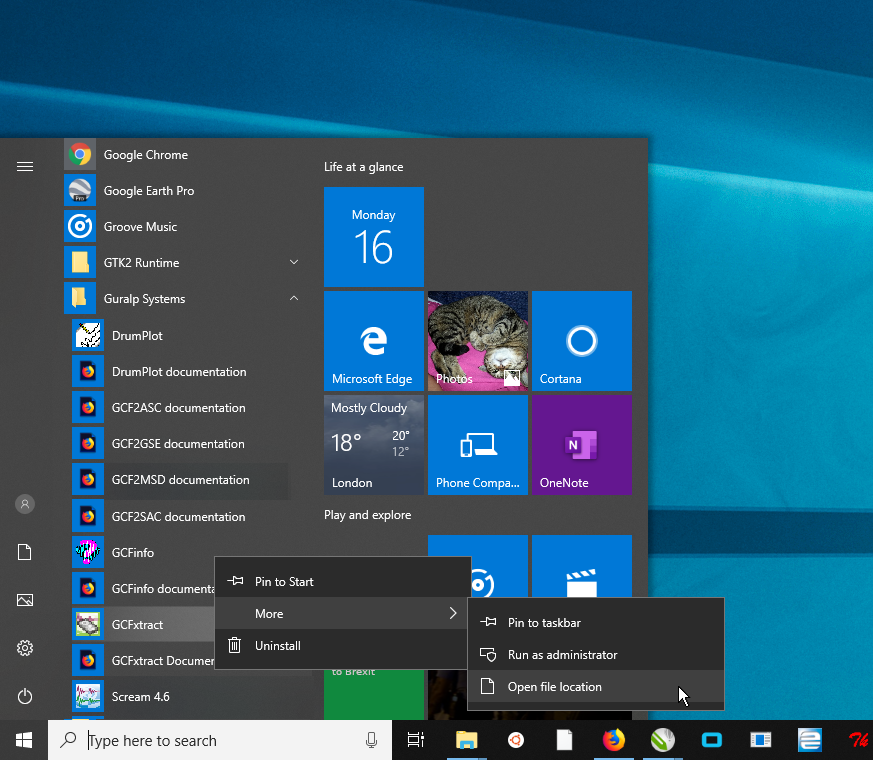
In the resulting Explorer window, right-click on GCFxtract and select from the context menu:
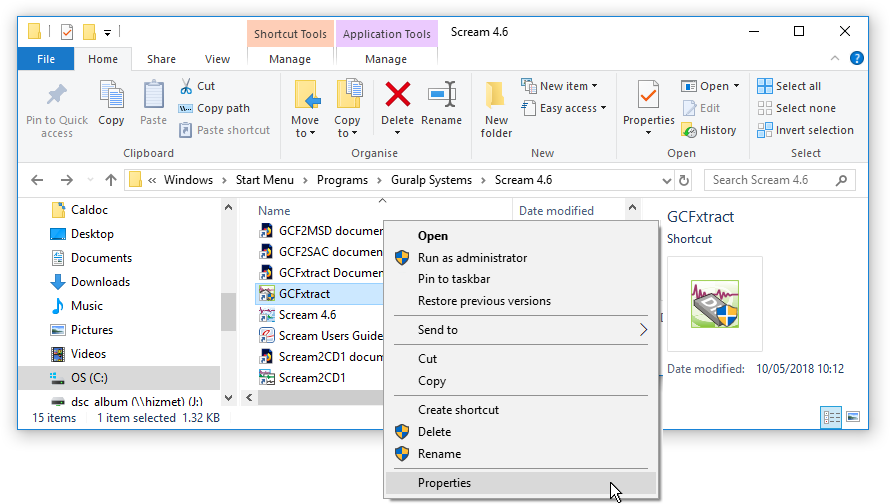
Switch to the Shortcut tab and click the
 button:
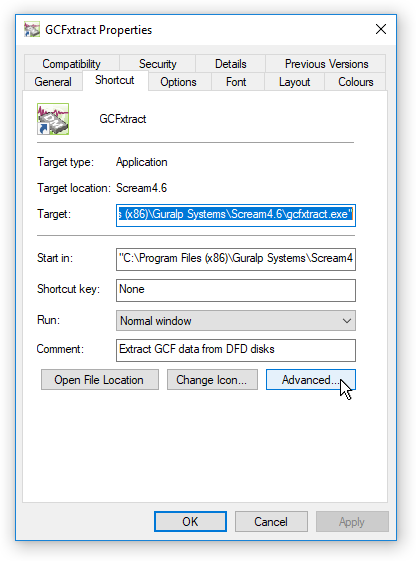
Click the Run as administrator check-box so that it has a ✔ in it and then click
 .
.The application will now run with administrative privileges when it is launched from the Start menu.
-
Under Linux, you need to run either as root or as a user with read/write permissions for raw disk devices. On most Linux systems, you can grant these permissions with the command
sudo adduser some_user_name disk
Using GCFXtract
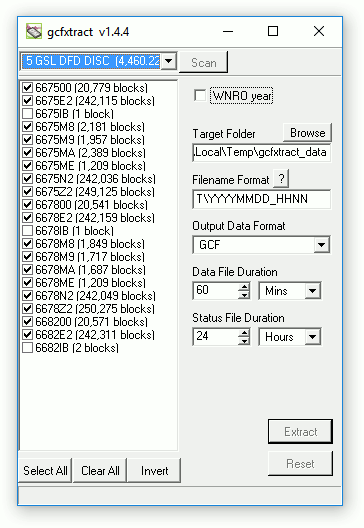
When you start up gcfxtract, the program searches all SCSI interfaces and devices for DFD-format disk drives. The ID of each disk is displayed in the drop-down list at the top of the window. Under each disk, gcfxtract lists the transfer sessions it has found on the disk. The digitiser creates a new transfer session each time it saves data to the disk. You can extract data either from a single transfer session or from the entire disk.
To extract GCF data from the disk:
-
Select the required disk or transfer session from the drop-down list, and click
 .
gcfxtract will scan the disk and display all
the streams it finds in the selection area below. For each stream, the
Stream ID and the number of blocks found are
shown. This operation requires roughly 12 Mb of available memory for every
Gb of space on the disk. If you have a very large disk, your computer may
have to use its hard disk to make enough space. This will slow down
scanning considerably.
 -
By default, all streams containing more than 100 blocks are selected for extraction. You can change which streams to extract by checking or clearing the check box beside each stream. You can check or clear all of the boxes using the
 and
and
 buttons. Clicking
 checks all unchecked boxes, and clears all checked boxes.
 -
Enter a path name into the Target Directory field, or use the
 button to find a directory. This will be used as the root directory for
extracted data. If it does not exist, gcfxtract will
create it.
 -
Enter a format string into the Filename Format field. The syntax is the same as the format string in Scream! and full documentation is available by pressing the
 button beside the format entry field in interactive mode.
 -
Normally, gcfxtract outputs GCF files, to ensure all the information in the original data is retained. If you want to convert to a different format, select it from the Output Data Format drop-down menu. gcfxtract can output in most of the formats supported by Scream!. Some formats require additional information to be specified: additional items will appear in the application's display will change to reflect this.
-
Data are automatically placed in time order and saved in multiple files, each file containing a contiguous segment of data. By default, data streams are recorded in files 60 minutes long. To change this to some other number of minutes, alter the value in the Data File Duration (mins) box. For data streams, if there is a gap in the data, gcfxtract will start a new file anyway.
Status streams are also saved in multiple files, but have a default length of 24 hours. To change this, alter the value under Status File Duration (hours).
-
When you are happy with the settings, click
 to begin extracting the data.
 -
Clicking
 sets a flag on the disk which marks it as empty. The next time a digitiser
wants to transfer data, it will begin at the beginning of the disk,
overwriting the old data. When this happens, none of the old data can be
extracted with gcfxtract or ReadSCSI.
Until then, however, you will still be able to retrieve all the
data.
Command line options
You can set default values for each field using the following command-line options:
-
/o:dir : Set the Target Directory to dir.
-
/f:format : Set the Filename Format to format. The format string is in the same format as that for Scream! and is documented by pressing the ‘?’ button next to the format entry field in interactive mode.
-
/d:data-format : Set the Data Format to data-format. Possible values are gcf, miniseed (or msd), saci (Intel byte order), sac (Motorola byte order), suds (or sud), gse (or cm6), segyi (Passcal SEG-Y, Intel byte order), segy (or sgy, Passcal SEG-Y, Motorola byte order), segys (standard SEG-Y, with shot-files), cssi (Intel byte order) and css.
-
/ld:duration : Set the Data File Duration to duration minutes. Alternatively, add h to the end of the duration to specify a number of hours, or d to specify a number of days.
-
/ls:duration : Set the Status File Duration to duration hours. Alternatively, add d to the end of the duration to specify a number of days.
-
/ids:list : Select only the Stream IDs starting with one of the strings in list for extraction (list is comma separated)
-
/t:count : Select only streams with more than count blocks.
-
/y:year : If the data being read have time-stamps older than the specified year, then a GPS Week-Number Roll-Over (GPS WNRO) is assumed to have occurred, and 1024 weeks are added to each time-stamp to ensure that it is after the given year.
-
/a : Batch transfer data from all connected disks, using settings (including stream selections) defined using the options above.
The following extra options are only used when argument /d:segys has been given:
-
/s:filename : Specifies the path to the shot-file.
-
/p190:filename : Specifies the path to the (optional) P1/90 file. Only 'S' records are processed.
-
/pre:value : Specifies the pre-shot data duration in seconds.
-
/post:value : Specifies the post-shot data duration in seconds.
-
/offs : Turns on removal of DC offsets during conversion.
Disk Image Files
You can extract data from one (or more) disk image file(s) by specifying their file names on the command line. For example:
The /a option (described above), used in conjunction with disk image files, is useful for building automated data conversion scripts.
GPS Week-Number Roll-Over (WNRO)
If the "WNRO year" check-box is ticked, an extra field appears which allows you to specify a "pivot" year for GPS WNRO calculations:
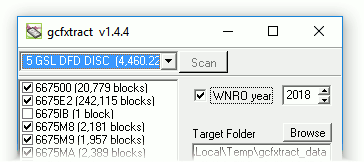
If the data being read have time-stamps older than (i.e. before) the specified "pivot" year, a GPS Week-Number Roll-Over event (GPS WNRO) is assumed to have occurred, and 1024 weeks are added to each time-stamp - multiple times if necessary - until the time-stamps are after (i.e. more recent than) the given pivot year.
For more information, first contact your local distributor or email .
