Minimus Demonstration
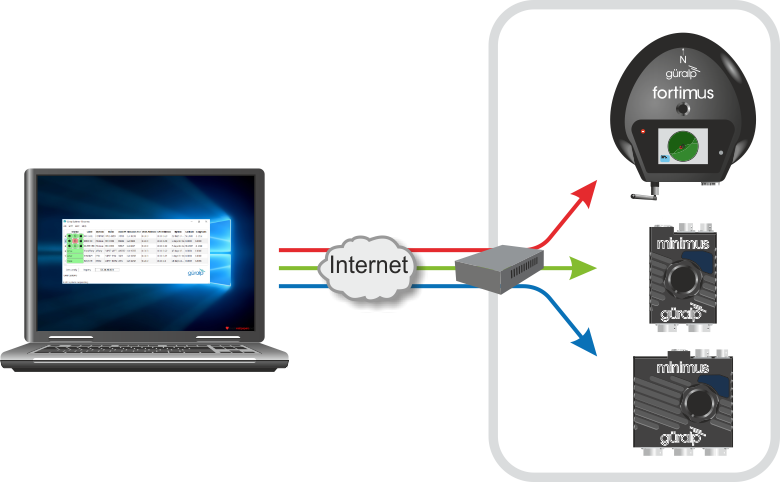
This document describes how to access an online demonstration system consisting of a Fortimus accelerometer, a Minimus digitiser and a Minimus+ digitiser. To complete the configuration, the user will need to know the Internet Address of the "station" and a registry group identifier, both of which will have been provided by your Customer Relationship Manager.
In order to mimic a real station, the three devices are connected to the Internet via a router which implements NATNAT stands for Network Address Translation, which is a mechanism for allowing access from the public Internet to a number of devices on a private network without exposing their individual addresses. . This means that some additional configuration work is required.
Install Discovery
At the time of writing, it is necessary to use a beta version of Discovery in order to fully access the demonstration digitisers. These installation instructions should be followed whether or not you already have discovery installed on your PC.
For this reason, the demonstration can currently only run on PCs and laptops running Microsoft Windows.
Download the discovery installer from the discovery download page, save it to a suitable location on your PC and then run it by double-clicking on it. Installation is straightforward but you can refer to the detailed instructions in §4.2 of the Minimus manual if you require guidance.
Configure Discovery
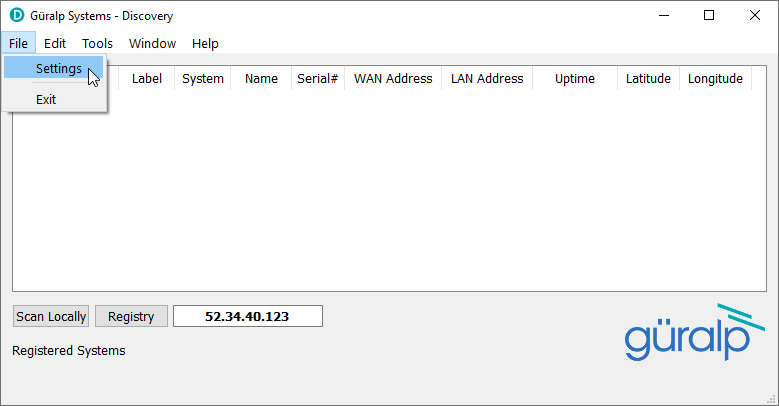
The Discovery installer will have offered to start the program for you. If you declined, start the program now by double-clicking its icon. The initial screen is displayed. Start by selecting from the menu:
The application configuration screen is displayed. Enter your Cloud registry group identifier into the text-field provided. The ID DEMO has been used in the illustration below: yours will be different.
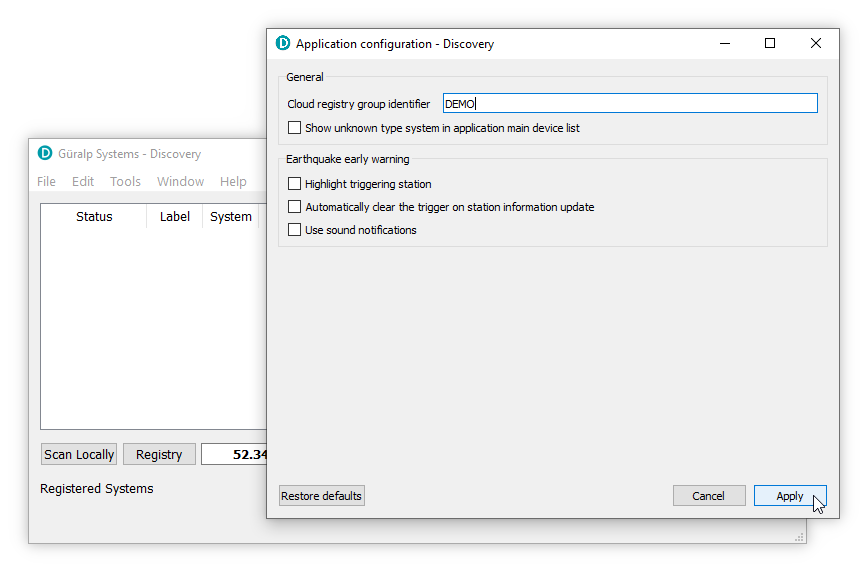
Click ![]() to continue.
to continue.
Check that the IP address of the Registry server is
52.34.40.123 as shown below and then click
![]() to put Discovery into registry mode.
to put Discovery into registry mode.
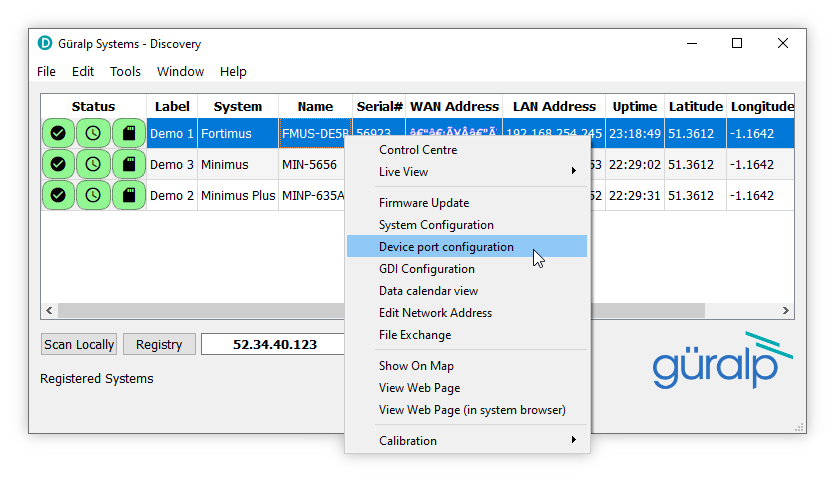
The three systems shown below should appear within a few seconds.
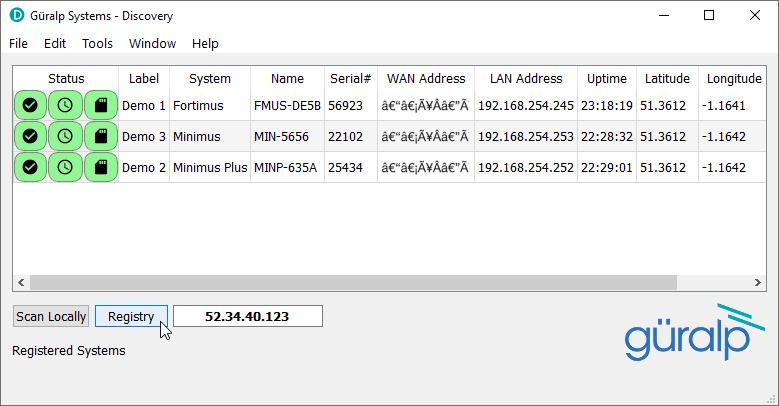
The WAN addresses will be the same for all three systems: this is the address of the router. The router has been configured to pass incoming connections to the individual digitisers using port-forwarding rulesA port-forwarding rule configures the router so that an external, incoming connection to port aaaa will get forwarded to port bbbb on a specified internal system. Many such rules can be in place simultaneously. See this Wikipedia article for more information.. Discovery cannot currently communicate with the digitisers because it does not know which ports to use. Our next task is to configure Discovery with the correct ports for each of the digitisers.
Right-click on the system labelled Demo 1 and select from the context menu:
The following dialogue appears:
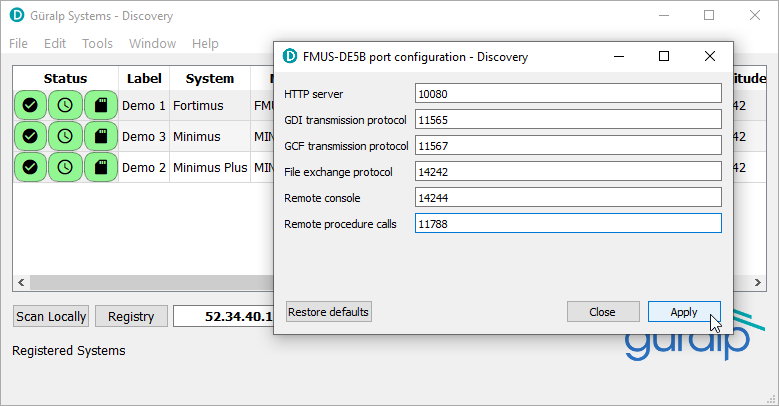
Fill in the fields as shown:
| Field | Value |
|---|---|
| HTTP server | 10080 |
| GDI transmission protocol | 11565 |
| GCF transmission protocol | 11567 |
| File exchange protocol | 14242 |
| Remote console | 14244 |
| Remote procedure calls | 11788 |
and then click
![]() . A confirmation screen appears:
. A confirmation screen appears:
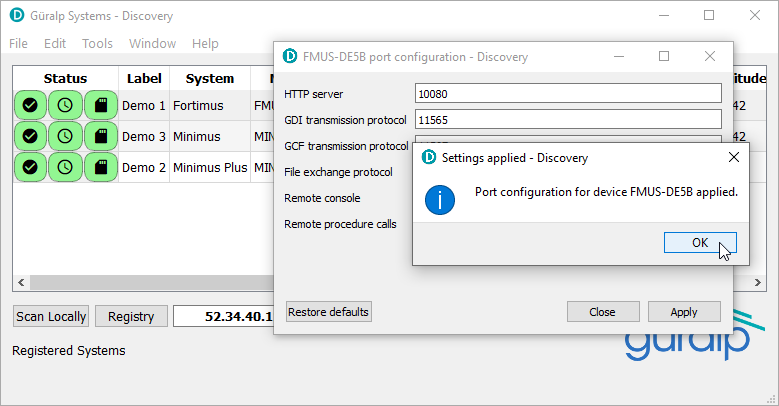
Click ![]() to close the confirmation and then
to close the confirmation and then
![]() to dismiss the dialogue.
to dismiss the dialogue.
Repeat this process for the other two systems, using the values from the table below:
| Field | Value for Demo 2 | Value for Demo 3 |
|---|---|---|
| HTTP server | 20080 | 30080 |
| GDI transmission protocol | 21565 | 31565 |
| GCF transmission protocol | 21567 | 31567 |
| File exchange protocol | 24242 | 34242 |
| Remote console | 24244 | 34244 |
| Remote procedure calls | 21788 | 31788 |
This completes the configuration of Discovery. You can now, for example:
- View live data by right-clicking on any of the digitisers and selecting from the context menu
- Identify locations by right-clicking on any of the digitisers and selecting from the context menu
- Explore configurations by right-clicking on any of the digitisers and selecting from the context menu
For more information, please see the Minimus manual, MAN-MIN-0001.
Scream configuration
You should have a copy of the standard Scream download instructions. If not, please send an email to scream.guralp.com giving your name, your institutional affiliation, the equipment with which you are working and an idea of the sort of work you will be doing. The rest of this section assumes that Scream is already installed.
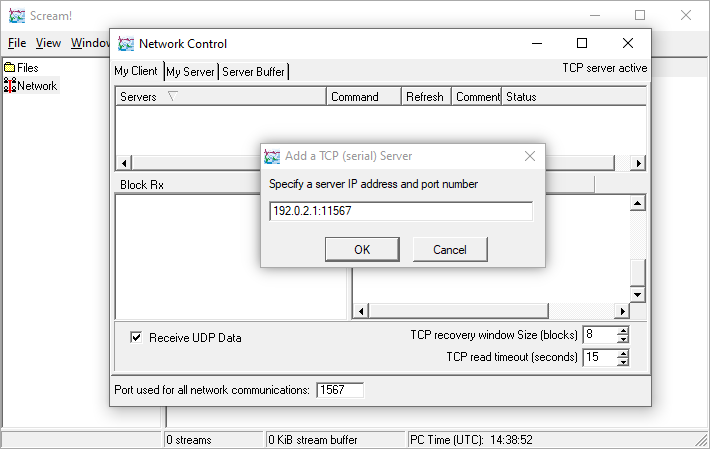
Start Scream and open the Network Control dialogue by keying Ctrl + N. When the Network Control window opens, select the My Client tab and right-click in the Servers list. Select from the context menu:
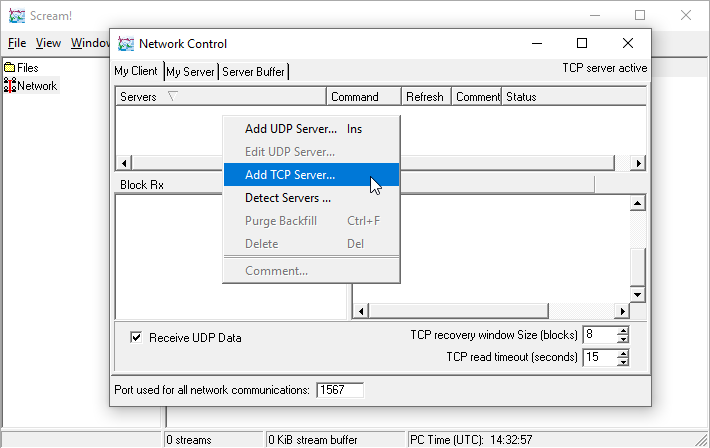
Enter the Internet Address of the "station", followed by a colon (:) and the port number 11567, as shown:
Click
![]() to proceed.
to proceed.
Repeat this process to add another two servers. All three use the same Internet address but the port numbers of the second and third are 21567 and 31567.
Once all three have been added, right-click on the first and select from the context menu:

Repeat this process to connect the second and third systems:
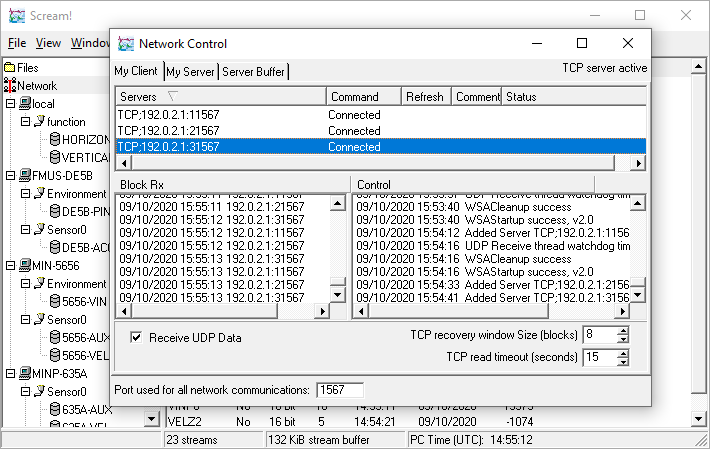
Data should start appearing within a few seconds and the source tree will be populated. Note that channels with slow sample rates will not appear for some time - this will be many minutes for those with the slowest rates.
You can now proceed to use Scream to monitor, analyse and save your data in many different formats. For more information, please see the Scream manual, MAN-SWA-0001.
MiniSEED data via SEEDlink
Many different packages can receive data in MiniSEEDMiniSEED is a subset of the industry-standard SEED format for seismic data, as defined by IRIS. See IRIS's miniSEED page for more details. format using the SEEDlinkSEEDlink is the standard transport protocol for MiniSEED data. For more information, see IRIS's SEEDlink page. protocol. Each has its own different method of configuration so discussion of such is beyond the scope of this document. As a demonstration, however, we will show how to use slinktool to read data from the demonstration systems. The source for slinktool program can be downloaded for free from the IRIS website.
To retrieve a list of available streams from the first demonstration systems, use slinktool with the -Q flag, followed by the Internet Address of the "station", a colon (:) and the port number 18000, as shown below. The examples use 192.0.2.1 where you should enter the address which you have been given.
To retrieve the corresponding lists from the other two systems, use the port numbers 28000 and 38000:
and for the third system...
In a similar manner, the same port numbers can be used to access other slinktool functions. The final example shows the headers of incoming packets from one channel from the third demonstration system being listed in real time: