Chapter 3. Gaining Access
3.1 Opening a cylindrical system
This section applies to all cylindrical systems (such as the DM24SxEAM) other than instruments with integrated EAMs.
If the system is mounted in a carrier assembly, remove the four thumbscrews securing the carrier assembly to the EAM body and remove the carrier assembly.
Make alignment marks on the casing and lids so that they can be re-assembled in the correct orientation.
Use a 2 mm hex key to remove the screws attaching the lids onto each end of the casing as shown in the image below. There are three screws securing each lid.

Identify the lid with the digital connectors and lever it off by placing a flat headed screwdriver in the notches provided and twisting.
Caution: It is easy to damage the components so do not use excessive force whilst prising off the top cover.
Caution: The force required will drop significantly when the O‑ring seals become clear of the the top of the cylinder. Take particular care that the lid does not “fly off” when this happens.
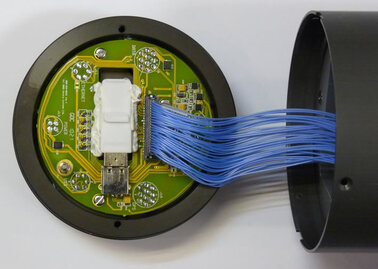
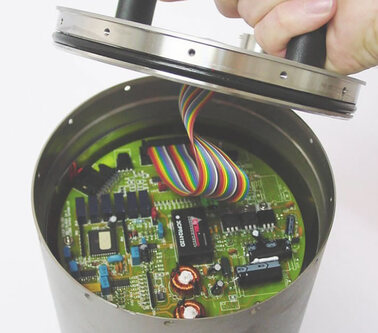
Lift the lid away from the cylinder and disconnect the ribbon cable from either the lid or the main EAM chassis.
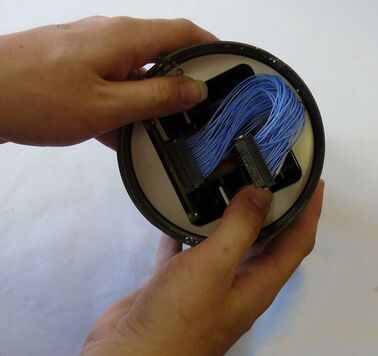
Push the internal chassis out of the casing using thumb pressure as shown in the figure below:
3.2 Opening a plastic-cased system
This section applies to all plastic-cased (Peli-cased) systems, such as DM24s, EAMs or DCMs.
Open the lid by releasing the clips either side of the carrying handle.
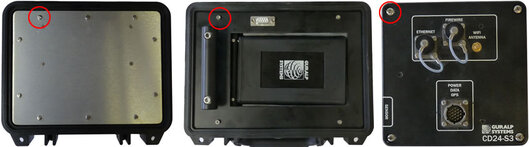
Using the appropriate screwdriver or hex-key, remove the fasteners securing the inner top panel as shown in the example images below:
Lift out the main assembly and disconnect any ribbon cables.
Caution: Do not pull or place any cables under tension or stress as this may damage internal circuitry.
3.3 Opening an instrument with an integrated EAM
Most instruments are assembled using standard components. Even if the instrument you are disassembling has different fasteners or configurations, the general principles detailed here should still be followed.
Make alignment marks on the base, casing and lid so they can be re-assembled in the correct orientation.
Use a 2 mm hex key to remove the screws attaching the the lid onto the casing as shown below:
Using the flat-bladed screwdriver, remove the pressure relief screw from the top of the lid as shown below:

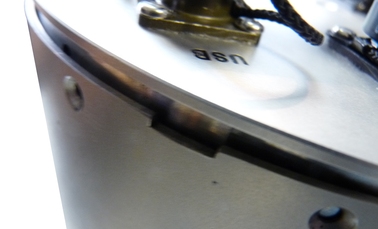
Lever off the lid by placing a flat headed screwdriver in the notches provided and twisting.
Caution: It is easy to damage the components so do not use excessive force whilst prising off the top cover.
Caution: The force required will drop significantly when the O‑ring seals become clear of the the top of the cylinder. Take particular care that the lid does not “fly off” when this happens.
Lift the lid away from the casing.
Whilst wearing an anti-static wrist-band, disconnect the ribbon cable connecting the lid to the lower electronics as shown in the image below:
Use a 2 mm hex key to remove the screws attaching the the casing onto the instrument base plate. These screws are located around the outer edge of the bottom of the instrument.
Carefully lever the casing from the baseplate using a flat headed screwdriver.
Lift off the casing slowly and vertically, taking care not to knock or jar the mechanical components inside.
Immediately cover the instrument with aluminium foil to prevent any ingress of dust or dirt. Do not be tempted to use cling-film, which carries an electrostatic charge which can damaged your instrument.