Chapter 9. Receiving Data
The modular architecture of Platinum software allows seismic data to be received simultaneously from a number of sources and using a number of protocols, as discussed in section 1.3. Extra protocols can be implemented by request: please contact Güralp Systems Ltd for more details.
At the time of writing, Platinum firmware is shipped with support for CD1.1, Güralp Compressed Format (GCF) data received over serial ports, GCF data received over a network using the Block Recovery Protocol (BRP) and GCF data forwarded from a copy of Scream!
The use of CD1.1 is covered in a separate manual, MAN-EAM-1100. The use of the other receivers is described in this section.
9.1 GCF from serial devices
Any or all of the serial ports may be configured to receive GCF data from a serially attached digitiser or digital instrument.
To configure a port for this purpose, select “Serial ports” from the “Configuration” → “All options” menu or select the “Serial ports” short-cut from the Configuration” → “Data transfer/recording” menu. To configure a physical network interface from the command line, start gconfig and select “Serial ports” from the top level menu.
The following screen appears:
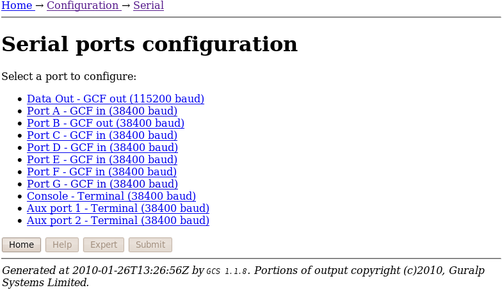
Each port on the system is listed along with its function and line speed. Any port can be used for any function with the exception of the console port, which is dedicated to the terminal function, and the internal ports used for inter-module communications in CMG-DAS units.
Note: When configuring units without a dedicated console port, such as the CMG-DCM, take care not to “lock yourself out” of the system by, eg, configuring all serial ports for non-terminal functions before completing network access configuration.
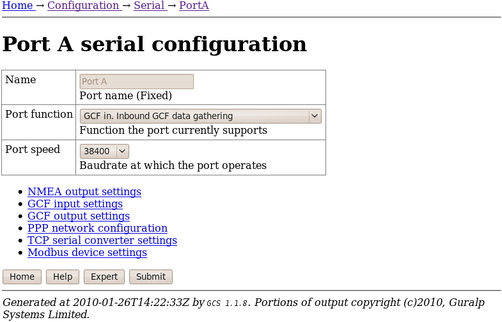
Select “GCF in. Inbound GCF data gathering” from the Port function drop-down menu, set the appropriate Baud rate using the Port speed drop-down menu and then click on the GCF input settings link.
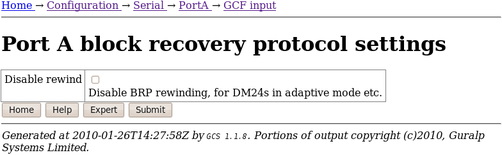
In standard mode, the only option available is to disable BRP rewinding. In some modes, some digitisers will not allow BRP to rewind to earlier blocks. In these modes, missed packets will, instead, be sent at a later time. However, the log-file will accumulate many entries about sending NAKs and giving up. These may be avoided by telling the receiver that its digitiser is using one of these modes and that rewinding will not work. The log messages are harmless, so leave this check-box clear if unsure.
The following additional options appear in expert mode:
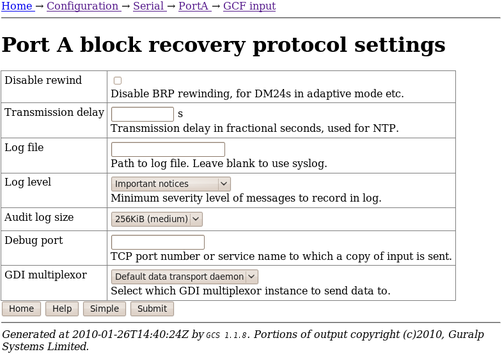
The Transmission delay text field allows the operator to specify the total delay incurred during packet transmission from the attached digitiser. Digitisers can produce special “RTSTATUS” packets which can be used to synchronise the NTP subsystem and, hence, the system clock, with the digitiser's own GPS-synchronised clock (see section 6.3 on page 64). Unlike normal NTP peer dialogues, there is no transmission delay discovery mechanism so, for optimal accuracy, it is important to specify the value here. The ordinary delay associated with packet transmission down a “short” serial cable is already calculated and used, so this field only needs populating if additional delays generated by, say, line drivers or modems, are encountered.
It may sometimes be desirable, for debugging purposes, to separate log messages for this input from the standard system log. The Log file text field can be populated with a path name which will then be used for dedicated logging. If left blank, logging occurs (via the standard Linux syslog facility) to /var/log/messages.
The Log level drop-down menu controls the level of detail present in log messages, whether to syslog or to a dedicated log file. Not all of the standard syslog logging levels are available. The menu offers a choice (in order of decreasing detail) of:
Debugging information;
Informational messages;
Important notices; or
Warnings
The GCF input subsystem keeps its own audit log, independent from the system log. The contents of this log are available using the “GCF Audit Log viewer” facility as described in section 13.3.2 on page 182. The amount of data retained is controlled by the Audit log size drop-down menu, whose choices are:
64Kib (small);
256Kib (medium);
2MiB (large); and
16MiB (huge).
It is possible to copy all incoming data, verbatim, to a network port, which can be specified in the Debug port text field. This is an advanced debugging technique which is beyond the scope of this manual.
In most configurations, all data from all inputs is sent to a single multiplexor which then feeds all outputs, as described in section 1.3 on page 10. For more complex configurations, it is possible to configure multiple multiplexers, each with their own set of input and output services. In these situations, the GDI multiplexer drop-down menu can be used to select a multiplexer instance with which to associate this receiver. The menu offers a list of currently configured multiplexers.
9.2 BRP - GCF From Network Devices
The CMG-EAM can receive data from network enabled instruments such as the CMG-6TD and networked digitisers such as the CMG-DM24. Data can be received from any number of sources, by creating multiple GCF BRP receiver instances.
To set up a GCF BRP receiver on the CMG-EAM, select “System services” from the “Configuration” → “All options” menu or select the “Services” short-cut from the Configuration” → “Data transfer/recording” menu. To configure a receiver from the command line, start gconfig and select “System services” from the top level menu.
From the “System Services” menu, select “GCF BRP network client”. The next screen shows a list of all GCF BRP receiver instances that have been configured:
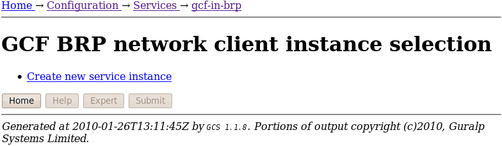
To configure a new GCF BRP receiver instance, select “Create new service instance”. The following screen allows you to configure the parameters of the service:
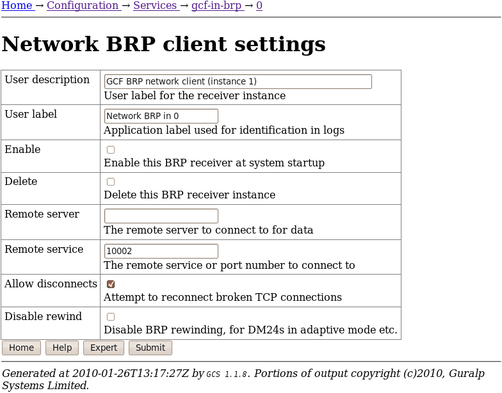
9.2.1 Configurable parameters in standard mode
The User description text-field sets the name of the service; this should be set to a meaningful name for the data that it will be receiving, such as the IP or hostname of the network digitiser.
The User label is another optional text-field. If set, this label is used to identify the particular client instance in log-files.
The service can be enabled or disabled at boot-up using the Enable check-box or deleted entirely using the Delete check-box.
Specify the hostname or IP address of the network digitiser in the Remote Server text-field and the port (name or number) that the digitiser is transmitting on in the Remote service box.
If the Allow disconnects check-box is ticked, the instance will attempt to automatically recover from lost connections by trying to reconnect to the server.
If the Disable rewind check-box is ticked, no attempts will be made to request missing data blocks. This should only be selected if the server is unable to fulfil such requests.
9.2.2 Configurable parameters in expert mode
Additional options appear on this screen when in expert mode:
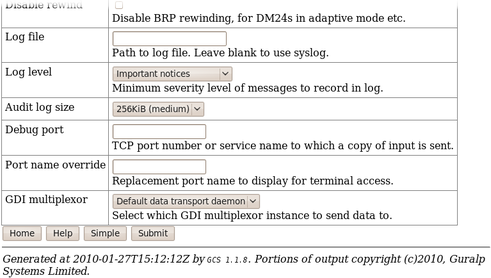
It may sometimes be desirable, for debugging purposes, to separate log messages for this input from the standard system log. The Log file text field can be populated with a path name which will then be used for dedicated logging. If left blank, logging occurs (via the standard Linux syslog facility) to /var/log/messages.
The Log level drop-down menu controls the level of detail present in log messages, whether to syslog or to a dedicated log file. Not all of the standard syslog logging levels are available. The menu offers a choice (in order of decreasing detail) of:
Debugging information;
Informational messages;
Important notices; or
Warnings
The GCF input subsystem keeps its own audit log, independent from the system log. The contents of this log are available using the “GCF Audit Log viewer” facility as described in 13.3.2 on page 182. The amount of data retained is controlled by the Audit log size drop-down menu, whose choices are:
64Kib (small);
256Kib (medium);
2MiB (large); and
16MiB (huge).
It is possible to copy all incoming data, verbatim, to a network port, which can be specified in the Debug port text field. This is an advanced debugging technique which is beyond the scope of this manual.
The Port name override text field allows the operator to specify a descriptive name for this data source. If left blank, it will be labelled with the IP address and service number of the source device, and this label will appear in, for example, the GDI channels display and the network tree in Scream!.
In most configurations, all data from all inputs is sent to a single multiplexor which then feeds all outputs, as described in section 1.3 on page 10. For more complex configurations, it is possible to configure multiple multiplexers, each with their own set of input and output services. In these situations, the GDI multiplexer drop-down menu can be used to select a multiplexer instance with which to associate this receiver. The menu offers a list of currently configured multiplexers.
9.3 Data from Scream! servers
The CMG-EAM has the ability to receive data over the network from Scream! servers. Data can be received from a number of Scream! servers using a single Scream! client.
To set up a Scream! client on the CMG-EAM, select “System services” from the “Configuration” → “All options” menu or select the “Services” short-cut from the Configuration” → “Data transfer/recording” menu. To configure a Scream! client from the command line, start gconfig and select “System services” from the top level menu. From the “System Services” menu, select “gcf-in-scream -- GCF Scream network client”. The next screen shows a list of all Scream network client instances that have been configured:
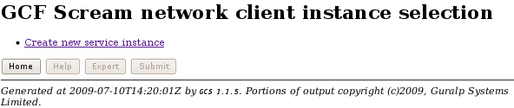
To configure a Scream receiver, select “Create new service instance”. The resulting screen allows you to configure the parameters of the service.
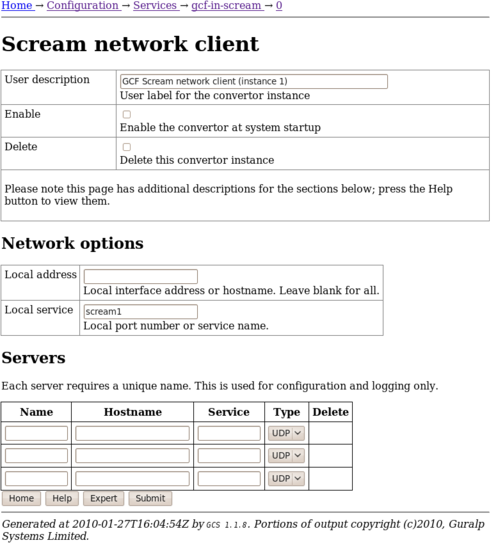
The User description field sets the name of the service; this should be set to a meaningful name for the data that it will be receiving, such as the IP or hostname of the Scream! server.
The service can be enabled or disabled at boot-up using the Enable check-box or deleted entirely using the Delete check-box.
If the CMG-EAM has multiple IP addresses, you can optionally restrict the client so that all connection attempts are made via only one address by putting it in the Local address field. You can also specify that requests should be made from a specific port number by entering it in the Local service field. These two fields can normally be left blank.
In the “Servers” section, you specify the details of the Scream! servers from which you want to pull data. The Name field should contain a descriptive name for identification purposes. The Hostname field must contain the DNS name or IP address of the desired server. The Service field should contain the UDP/TCP port number on which the server is listening for data requests. Port numbers can be mapped to names using the standard Linux /etc/services file, which can be edited from the command line.
In the Type column, choose whether you wish to use UDP packets or TCP connections. With UDP packets, the GCF protocol keeps track of which packets have been received and automatically requests retransmission of any missing data. TCP, on the other hand, is a connection-orientated protocol which handles packet sequencing and retransmission itself (at the cost of a little extra network overhead).